Thursday, October 31, 2013

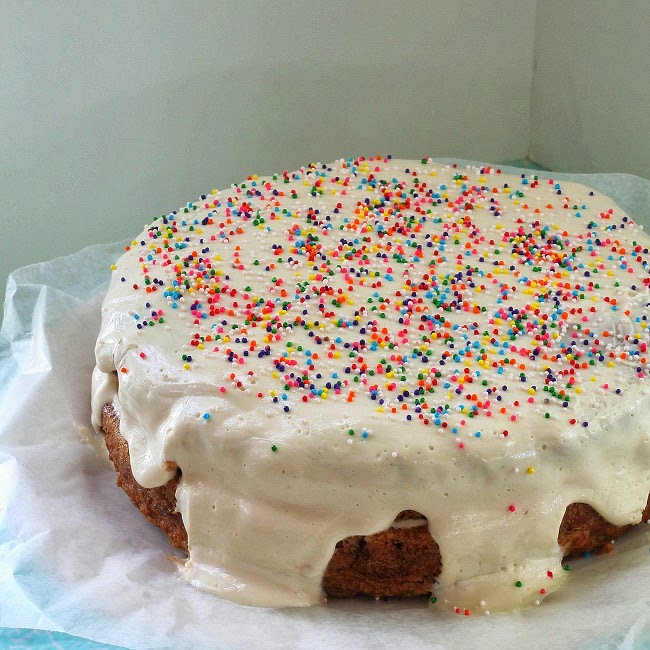
Cookies 'n Cream Blondies

So what are your thoughts on Cookies 'n Cream?


Personally, I love it.  It's like getting two desserts in one.  Oreo's and ice cream, fudge, cake, etc.  Who could dislike that?

I'm just surprised it took me so long to get in on the cookie 'n cream action.


I created a homemade Oreo recipe in May, and though I've made that original recipe several times, I never thought to do anything else with the Oreos.  Ugh, stupid!

Don't worry though, I'm making up for it today.  I've got a kick-butt blondie recipe for y'all that's totally gonna blow you away.  Seriously, try it.

(P.S. Next up... Ice Cream!)


Cookies 'n Cream Blondies
Blondies:
  • 3/4 cup + 2 tbsp spelt flour
  • 3 tbsp arrowroot starch/flour
  • 1 tbsp baking powder
  • 3/4 cup applesauce
  • 1/4 cup date paste
  • 1/2 cup yogurt
  • 1/2 cup buttermilk
  • 1 tbsp ground flax
  • Oreo Cookies, crumbled
Frosting:
  • 1 banana (don't use a banana that has been frozen, than thawed)
  • 1/2 cup yogurt
  • 1 tsp vanilla
  • 5-6 Oreo Cookies, crumbled
Preheat oven to 350F.  Grease a muffin tin. In a large bowl, mix together flour, arrowroot, and baking powder.  In another bowl, combine applesauce, date paste, yogurt, buttermilk, and ground flax.  Add wet ingredients to dry and mix until a smooth batter forms.  Fold in crumbled Oreos.  Divide batter between entire muffin pan.  Bake in preheated oven for 15 minutes, until firm.  Let cool completely.
Meanwhile, make frosting.  Combine banana, yogurt, and vanilla in the bowl of a food processor.  Process until completely incorporated. Mix in crumbled Oreos.  Spread frosting on top of each blondie and store in fridge.  Makes 1 dozen.


Pin It!

Monday, October 28, 2013

Crustless Marbled Chocolate Pumpkin Pie

Can you believe how fast October is flying by?  Yeah, me neither.


I'm definitely not the only one saying this, but holy cow, has the month flown by.  Halloween's less than a week away, Novembers just a day after that, and fall is in full swing.  

It's time for some pumpkin action, is it not?


Today's pumpkin masterpiece is pretty awesome, if I do say so myself.

I started with a delicious (and super healthy!) Pumpkin Pie filling.  Then a I made my favorite Tofu Chocolate Mousse.  Finally- and this is the best part- I swirled them together!

My oh my, did it turn out delicious.  You've got to bake this pie this fall season, or you will be seriously missing out.


Crustless Marbled Chocolate Pumpkin Pie
Pumpkin Layer:

  • 1 (15 oz) can pumpkin puree
  • 1 cup milk
  • 1/3 cup spelt flour
  • 1/4 cup maple syrup
  • 1 flax "egg" (1 tbsp flax + 3 tbsp water) or 2 egg whites or 1 egg
  • 2 1/2 tsp cinnamon
  • 2 tsp baking powder
  • 1 tsp vanilla
  • 1/2 tsp ginger
  • 1/4 tsp salt
Chocolate Layer:
  • 1 (12.3 oz) package shelf stable tofu (I used the brand from Trader Joe's)
  • 1/2 cup cocoa powder
  • 1/2 cup melted chocolate chips
  • 2 tbsp maple syrup
  • 2 tbsp milk
Preheat oven to 350F.  Grease a 10in round pan.  In a large bowl, combine all ingredients for pumpkin layer.  Mix until incorporated and smooth.  Set aside.  In the bowl of a food processor, combine all chocolate layer ingredients.  Blend, on and off, until everything has been combined and there are no tofu lumps.  Scrape down the side of the machine as necessary.  
To create the marbled effect:  Start with the pumpkin layer.  Take large spoonfuls and put them in the pan at random until about 1/2 the batter has been used.  Do the same with the chocolate layer.  After 1/2 the chocolate has been used, go back to the pumpkin and use the rest.  Repeat with the chocolate layer.  At this point, there should be some type of batter filling the entire pan.  Take a knife and swirl it through the top to make it look pretty.  After that, it's ready to bake.
Bake in preheated oven for 35-40 minutes, until firm.  Let chill in fridge overnight before slicing and serving.


Pin It!

Wednesday, October 23, 2013

Slow Cooker Moroccan Stew

Toss All of That CSA Stuff into Your Slow Cooker!


 It’s week 21, and I think I have CSA fatigue. Or maybe it’s CSA battle fatigue.  (For those of you have not yet discovered the WTF CSA series from Huffington Post, they are worth a detour.)  http://www.huffingtonpost.com/2013/08/02/nettle-recipes-stinging-how-to-cook_n_3690035.html

In August, we conquered ½ bushel of Asian eggplants.  No problem.

In September, we won a hard fought battle against 26 pounds of fresh tomatoes.  (Toward the end, we just cored them and threw them into the freezer.  You can just toss a few into your soup or stew, and it works just like canned tomatoes.)

Now I am faced with 4 pounds of carrots, collard greens, and a whole lot of turnips.  (I am pretty sue I hate turnips, but I am willing to give them a chance.)  But I have a new weapon…  A slow cooker!

So I cleaned and chopped, tossed it all in with a handful of spices, and waited.  Turns out, my slow cooker is about to be my new best friend.  This stew is absolutely delicious!

Moroccan Vegetable Stew

2 Tbs. olive oil
2 medium onions, chopped coarsely
3 cloves garlic, minced
2 tsp. cinnamon
1 tsp. cumin
1 tsp. paprika (smoked)
1 tsp ground coriander
1 tsp cayenne pepper
2 cups water or vegetable broth
1 (28 ounce) can of tomatoes
11/2 lbs. carrots, peeled and cut into ½-inch chunks
2 medium turnips, peeled and cut into ½-inch chunks
1 bunch collard greens, cut into ½-inch strips
1 (15 ounce) can garbanzo beans, drained
½ cup yellow raisins
1 Tbs. balsamic vinegar

Heat the oil in a large frying pan over medium heat. Add the onions and a pinch of salt and cook over medium heat until translucent, about 4 minutes. Add the garlic, cinnamon, coriander, cumin, cayenne,, and a pinch of pepper and cook until fragrant, about 1 minute.

Transfer the mixture to a slow cooker, add the liquid and canned tomatoes, mixing them with the onions and crushing the tomatoes into smller bits. Add the  carrots, turnips, and collard greens. Stir to combine.
Cover and cook on high for 1 1/2 hours.

Add the chickpeas, raisins, and balsamic vinegar, season with salt, and stir to combine.

Cover and continue to cook on high until a knife easily pierces the vegetables, about 2 hours more, stirring after 1 hour.


Pin It!

Sunday, October 20, 2013

Chocolate Peanut Butter Granola Bars

I'm gonna let you in on a not-so-secret: I've been super busy lately.


It's not really a secret because if you so much as look around this blog you can probably tell.  How many posts have there been in October so far?  Not nearly enough.  How many recipes are missing from the recipes page? Like 4 months worth.  I'm falling behind on here, and I want to say one thing all you readers:

I'm so sorry!


I really wish I could do everything, but sometimes I'm forced to put one thing before the other.  I'm sad to say that this blog doesn't always take priority.

However, I'm pretty sure things will be slowing down within the next month, so fingers crossed everything goes back to normal around here!


How does this translate into today's recipe?

Well, these Chocolate Peanut Butter Granola Bars were a super helpful during days when I was rushing all over the place and didn't have time to grab a proper snack.  Instead of a grumbling belly, I got to snack on a delicious homemade granola bar!  Big, big help, I tell you.  Plus, they're no bake, so they even with the busiest schedule, you can fit in time to make them.


Chocolate Peanut Butter Granola Bars
  • 2 cups rolled oats
  • 1/2 cup uncooked quinoa
  • 2 tbsp chia seeds
  • 1/3 cup whole wheat pastry flour
  • 1/3 + 1/4 cup peanut butter
  • 1/4 cup honey
  • chocolate, melted (I didn't measure it, just know you'll need enough to dip all the bars in)
Mix together oats, quinoa, chia seeds, and flour in a large bowl.  Place peanut butter and honey in another bowl.  Microwave in 15 second intervals until drippy.  Mix together.  Add peanut butter honey mixture to dry ingredients and mix until completely incorporated.  Form into bars (I made small squares) and place in fridge to firm (about an hour).  Once firm, remove from fridge and prepare melted chocolate.  Line a plate/pan with parchment paper.  Dip one side of bar in chocolate and place chocolate side up on parchment paper.  Repeat with all bars.  Return to fridge to let chocolate form.  Store in fridge.  Makes about 15 bars, but it changes based on size.


Pin It!

Tuesday, October 15, 2013

Vegan Double Chocolate Cookies


When the weather cools down, as it has been doing where I live, I find that all I want to eat are warm things.  That smoothie that sounded really good two weeks ago?  No desire at all now.  And the yogurt sitting in the fridge?  Nope.  Even the frozen berries, which normally disappear from our freezer within days, sound somewhat unappealing unless they've been thawed to a normal temperature.

There's one food desire hasn't changed with the weather though, and that's dessert.


I supposed I'm just a dessert kind of girl.  The idea of chocolate or cake will never seem unappealing, and that's just fine by me.  But I have learned that there are some things that make dessert even better.

One of those things is when you eat a freshly baked cookie on a cold day.  Seriously amazing.


With all the chocolate found in these cookies, they're definitely a recipe worth eating warm.  Nothing beats melted chocolate. Nothing.

Vegan Double Chocolate Cookies

  • 1/4 cup cane sugar
  • 2 tbsp coconut oil, melted
  • 1/2 cup milk
  • 2 tbsp applesauce
  • 1 tsp vanilla
  • 1 cup spelt flour
  • 1/3 cup cocoa powder
  • 1/2 tsp baking soda
  • 1/4 tsp salt
  • 1/2 cup chopped chocolate
Preheat oven to 350F.  Grease/Line a baking sheet.  In a small bowl, mix together sugar, oil, milk, applesauce, and vanilla.  In another bowl, mix together flour, cocoa, baking soda and salt.  Add wet ingredients to dry and mix until a sticky dough forms.  Mix in chopped chocolate.  Take balls of about 1 tsp of dough and place on baking sheet.  Repeat until all dough has been used.  Bake in preheated oven for 8-10 minutes, until cookies are firm.  They may look a bit under cooked when you take them out, but that's ok.  Right after the cookies come out of the oven, take the back of a spoon and flatted them.  Let cool.  Once cooled, store in an airtight container until serving.  Makes 14 large cookies.


Pin It!

Friday, October 11, 2013

Apple Crumble Bars

I've already gone apple picking twice this season, yet I've neglected to post an apple recipe.  Oops?


The truth is, I've only made one so far.  Double oops?

But, in the hopes of regaining at least some of my food blogger status, it was a really good recipe and I still have 20 billion apple to use.  Soooo, hopefully there'll be a bit more of an apple explosion in the weeks to come.


Back to today's recipe.  It's simple, yummy, and positively full of fall flavor.  We've got apples, cinnamon, some maple syrup, all baked to warm perfection.  With vanilla ice cream or whipped cream it would be absolutely perfect.

So there.  Let the apple season of Mix it Up begin!


Apple Crumble Bars
For crust:

  • 1 1/2 cups oat flour
  • 1/2 cup rolled oats
  • 1 tsp cinnamon
  • 1 tsp baking powder
  • 1/2 tsp baking soda
  • 1/2 cup applesauce
  • 1/4 cup maple syrup
  • 2 tbsp milk (or more if dough seems to think)
  • 1 tbsp coconut oil, melted
For Filling:
  • 2 1/2 cups chopped apples
  • 2 tsp cinnamon
  • 2 tbsp cornstarch/arrowroot flour/starch
  • 2tbsp maple syrup
Preheat oven to 350F.  Grease an 8x8 square pan.  Mix together dry ingredients for crust in a large bowl.  Add wet and mix until a sticky and thick dough forms.  Add more milk if needed.  Take about 2/3 of the dough and press into the bottom of the pan until the whole area is covered.  Set aside remaining dough.  In another bowl, mix together all filling ingredients.  Pour filling onto dough in pan.  Scatter remaining dough in top.  Bake in preheated oven for 25-20 minutes, until crust has turned golden brown.  Let cool before cutting into 16 squares.  I think these are best served warm.


Pin It!

Saturday, October 5, 2013

Vanilla Spice Layer Cake

Fancy cakes are my favorite :)


They're pretty, and delicious, and people think you slaved away in your kitchen for hours making them, but, I'm gonna tell you a secret, you don't have to.

Layered cakes and cakes with multiple flavors are actually super easy.  Well, at least my recipes are.  I'm not one to get too complicated.  I just like making people think I worked really hard, when in reality, the recipe was a breeze.


This cake is like that.  Two layers of cinnamon spiced vanilla cake topped with creamy greek yogurt frosting and an onslaught of sprinkles, if you're in that type of mood.  I'm always in that type of mood.

Anyway, while this cake may seem difficult, it's totally the opposite.  The batter comes together quickly with the help of your food processor, and the frosting takes no more than 3 minutes to mix up.  After that all you gotta to is bake, assemble, and eat.  The eating part is extra easy.


Vanilla Spice Layer Cake
Cake:
  • 2 cups spelt flour
  • 1/4 cup ground flax
  • 2 tsp baking powder
  • 1 tsp baking soda
  • 1/2 tsp salt
  • 420 grams (about 4 cups) frozen cauliflower, thawed
  • 1 1/3 cup milk
  • 1/3 cup honey
  • 2 tbsp coconut oil, melted
  • 2 tsp vanilla
Frosting:
  • 2 cups plain (or vanilla) greek yogurt
  • 1/4 cup honey
  • 2 tsp vanilla
Preheat oven to 350F.  Grease two 8 in circle pans.  In a large bowl, mix together all dry ingredients.  In the bowl of a food processor, combine remaining cake ingredients in the bowl of a food processor.  Process until completely smooth with no cauliflower lumps.  Add wet ingredients to dry and mix until completely incorporated and a batter has formed. Fill prepared pans about 2/3 of the way full with batter.  If you have extra, make a few cupcakes.  Bake cakes for 20 minutes, until a toothpick inserted comes out clean.  Let cool completely.  Meanwhile, combine all frosting ingredients in the bowl of a food processor (Just rinse well from last use).  Blend until all ingredients are incorporated.  Remove one cake from pan and place on a large plate.  Spread a thin layer of frosting on top.  Add other cake on top.  Use remaining frosting to frost on top and all around cake.  Store in fridge until serving time.  When ready to serve, slice into 8-10 slices and enjoy!


Pin It!