Wednesday, February 27, 2013

What I'm Eating: February 2013


It's back!

This month I've got even more delicious foods to share with you, so buckle up and I hope you're hungry!

First up...


Avocado Toast - ok, so I'm definitely not the first one to do this. No, sir.  I've seen it on billions of other blogs, most of which with pictures far better than the one above.  Well, let me just tell you, there is definitely a reason for the popularity.  Though simple, mashed avocado on toast is sooo good.  So good.  It makes a great snack, lunch, dinner, breakfast.  You name it!  I like having it on a sandwich thin (pictured above) or a piece of P28 bread, if I want to up the protein a bit.  It's also really good if you add a bit of orange muscat vinegar before mashing.  Trust me, I've been eating this stuff non stop.

If you'd like to go drool, here are some of the blogs that I was talking about that have already shared their love for avocado toast:


Adora Calcium Chocolates - If you're being picky, these don't exactly count as a food, but I've been eating them a ton.  What can I say?  I "adora" them (please excuse the awful joke).  Anyway, these chocolate really were a great find.  I always struggle with getting enough calcium daily, probably because I'm not much of a milk drinker at all.  I've tried other calcium supplements, but I find the sugary gummies gross and there's really nothing fun about a pill.  But chocolate?  I'm in!  I have the dark chocolate adoras, and while they're not the best piece of chocolate I've ever had, but they sure beat choking down a pill, and as a bonus, they make a great after dinner treat.  Satisfying my calcium requirement and my sweet tooth is a mighty hard task, but these adora chocolates do it, and do it well!


Wheat Berries - We like grains at my house.  Lots and lots of grains.  Two full drawers in the kitchen are devoted to quinoa, barley, farro, and more recently, wheatberries.  After my mom purchased nearly 200 pounds (slight exaggeration) of wheat berries from iherb, we've been eating them a ton.  They're much chewier than rice or quinoa, with a slightly nutty taste.  The most common way we eat them is in salads, but they're probably great for a variety of other things, including eating them by the handful, if you ask me.

If you've never heard of wheat berries (I don't really blame you), then head over to some of these links for awesome recipes to get you started.  Really, you need to try them.
  • Brown Sugar Apple, Wheat Berry Yogurt Parfaits - Wheatberries for breakfast?  No, I haven't tried it, but the pictures are absolutely mouthwatering and I can totally see wheatberries working beautifully in a sweet recipe.  Sort of like a chewy granola, maybe.  And brown sugar + apples  is always a plus.
  • Lemony Wheat Berries with Roasted Brussel Sprouts -  Yum.  Yum yum yum yum yum.  This recipe right here is a keeper.  Its lemony, it's  Brussels sprout-y,  it's just plain good.  I tried it, I loved it, end of story.
  • Wheat Berries with Charred Onions and Kale - Kale!  Charred Onions! Wheat Berries!  This dish sounds like heaven to me.  I haven't gotten around to trying it yet, but I definitely will soon.  It sounds way too good to pass up, that's for sure.

Kashi Crunch! - Have I mentioned how I don't like nuts in my granola?  Well, this cereal has a very similar texture to granola, but it's completely nut free (unless you get the almond type).  Like the name suggests, Kashi Crunch! is super crunchy, which I love.  It's also much more filling than most other cereals, thanks to the 9g protein and 8g fiber in each serving.  Oh yeah, and it also happens to be pretty delicious!  Most of my Kashi Crunch! is put to use in yogurt and fruit parfaits, but I've also made peanut butter granola bars with it (literally just a random mix of peanut butter, applesauce, and the cereal baked until it holds together) and a sort of pie crust thing (recipe for that is coming soon).  And, as with many of my favorite food products, I think Kashi Crunch! is great for snacking, too, right out of the bag!


Mandarin Orange Spice Tea - There is no doubt that I love tea.  I drink it everyday, sometimes more than once.  Herbal flavors are my favorite, and the Mandarin Orange Spice flavor from Celestial Seasonings is especially tasty.  It does have an orange-y flavor, not as much as orange juice or anything, but what I love most is the spice.  It's a mix of all these warming spices as far as I can tell and it makes me feel so cozy when I'm curled up with a steaming mug.  I've found that the mandarin orange flavor is pretty good to add to foods as well.  It provides a bright punch of flavor.  I add the leaves to oatmeal, soup, and muffins.  You could also make a bread like this one, with the Mandarin Orange flavor and I'm sure it would be great.

Revisited Recipe of the Day: 

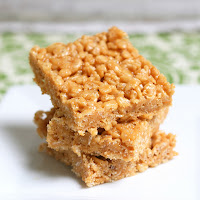
Peanut Butter Rice Crispies


March 1st is National Peanut Butter Lover's Day.  The recipe above is super quick and a great way to celebrate.  You can also just type peanut butter into the search again in the upper left.  That'll give you a whole bunch of recipes to choose from!


Pin It!

Monday, February 25, 2013

Tater-less Tots

I'm gonna tell you something now and you have to promise not to laugh.  Ok?  You promise?  Alrighty then.


Here it is:

Before making this recipe, I didn't realize that the "tater" in "tater tots" had to do with potatoes.  I know, I'm an idiot.


But it just never occured to me.  I thought tater was just a funny word that sounded good with tot, which was just another funny word that let you know that whatever dish you were about to eat is small.

The whole tater = potato thing sort of flew right past me.  Whoops.


I didn't realize the connection until after I had made these tater tots (which actually taste like the real thing, believe it or not, even though they're made with a single 'tater).  I was trying to decide on some clever name for the recipe, with no luck might I add, when everything became clear.

I felt so stupid!  After a big long "ohhhh" I decided to call this recipe Tater-less Tots, and then I ran into my kitchen to eat more of them in hopes of halting the embarassment.  It didn't work... but at least the tots were delicious!

Tater-less Tots

  • 1 1/2 cups (1 can) chickpeas, rinsed and drains
  • 120 g cauliflower, chopped into small pieces
  • 1 cup cooked quinoa (about 1/3 cup dry)
  • 1/4 cup ground flax
  • 1/2 tsp salt
  • 1/2 cup finely minced shallot
  • 1/4 cup whole wheat flour
In a large bowl, mash chickpeas until mostly broken up.  Add in remainging ingreidents and mix until combined.  Mixture probably won't hold together too well.  Do your best to form into tater tot shapes.  Warm a frying pan over medium heat and pour a bit of olive oil in.  Place tater tots in batches on pan and cook for a couple minutes on each side until browned and crispy.  Store in fridge.   Recipe makes 3-5 servings.


Right now you're probably looking at the ingredient list above and thinking that I'm even crazier than the story I already told you implied.  Just trust me.  It sounds nuts, but those ingredients really do come together to create something that tastes like a potato.

Which by the way, is what "tater" means in the phrase "tater tot".  You know, 'cause I know that now.


Revisited Recipe of the Day:

Vegan Sweet Potato Chili


Pin It!

Saturday, February 23, 2013

Mousse Frosted Chocolate Chip Cake

I never really mentioned it, but my birthday has officially come and gone.  I am now one year older!


This year I decided to make my own cake to celebrate the special day, and I am so happy I did.

It sounds a bit weird, but creating birthday cakes really stretches my creativity to the max.  Birthdays only come once a year, after all, so whatever cake I make has to be simply spectacular.  This cake totally delivered.


On my birthday when I first dug into the cake, I swear I almost sighed, it was so delicious.  And I wasn't the only one.  My whole family loved the cake, digging into their second piece without hesitation.  My dad even said it could have been served in a restaurant.  Now that's a big compliment!


Little did my fellow family members know, this cake is also super good for you!  

The base is a fat free chocolate chip cake recipe and the decadent frosting on top is, my personal favorite, a tofu chocolate mousse.  Combind they create a one of a kind cake that will blow whoever eats it away, whether they know it's healthy or not.

I don't care if it's your birthday or just a monday night.  You need to make this cake, and soon.


Mousse Frosted Chocolate Chip Cake
Cake:

  • 1 1/2 tbsp ground flax
  • 4 1/2 tbsp water
  • 1 1/2 cups spelt flour
  • 1/4 tsp cinnamon
  • 1 tsp baking powder
  • 1/4 tsp salt
  • 3/4 tsp baking soda
  • 1 tbsp vanilla extract
  • 220 g mori-nu silken firm tofu
  • 1/2 cup applesauce
  • 1 1/2 tbsp maple syrup
  • 1/2 cup chocolate chips
Frosting:
  • 200 g mori-nu silken firm tofu
  • 3 tbsp special dark cocoa powder
  • 1 1/2 tbsp maple syrup
  • 2 tbsp chocolate chips, melted.
  1. Preheat oven to 350F.  Line an 8x8 square pan with parchment paper (enough to cover sides of pan).
  2. In a small bowl, mix together flax and water.  Set aside.
  3. In a large bowl, mix together all remaining dry ingredients for cake.
  4. Combine flax mixture, vanilla, tofu (amount for cake only), applesauce, and maple syrup (amount for cake only) in a blender.  Blend until completely smooth.
  5. Pour wet ingredients into flour mixture and mix well until a smooth batter forms.  Fold in chocolate chips.
  6. Scoop batter into prepared pan.  Smooth on top.  Bake in preheated oven for 17 minutes.
  7. Meanwhile, make frosting.  Combine all ingredients listed under frosting in blender (it can be the same one as before) or food processor.  Blend until smooth and creamy.
  8. When cake is done, pour frosting/mousse over the top.  Smooth into an even layer.
  9. Chill cake for at least 6 hours, or overnight, until mousse on top is firm.
  10. Cut into 16 squares and serve.  Store any leftovers in the fridge.


Enjoy, everyone!

Revisited Recipe of the Day:
Pin It!

Thursday, February 21, 2013

Chocolate Waterfall Brownie Bites (Recipe ReDux)

You know what's coming in three days?  The Oscars!

And you know what the Recipe ReDux theme for this month is?  A healthy recipe inspired by your favorite food scene/featured food in a movie!


Now, I'm not really a movie person, but there is one film that popped into my head right away...

Anyone want to guess what it was?  (Hint: There's a whole lot of chocolate involved)


Charlie/Willie Wonka and the Chocolate Factory!

Whether you prefer the version from the 1970's or 2000's, you can't deny that the above movie is definitely a mouth watering one.  Please tell me I'm not the only one who has dreams containing that completely edible room!

Or, more specifically, the chocolate waterfall.


That rich, decadent, thick stream of water pouring down from the sky nearly has me drooling every single time I see it (until Augustus Gloop falls in, that is, after that it's somehow less appealing).

I had the waterfall in mind as I was making these brownies.  I was going for rich, fudgy, and mega chocolatey.  And you know what?  I totally accomplished my goal.  When you try one of these delicious brownies, it's like biting right into a waterfall!


Chocolate Waterfall Brownie Bites
  • 1/2 cup cocoa powder (dutch processed if possible)
  • 1/2 cup whole wheat flour
  • 1/2 cup spelt flour
  • 1/2 tsp baking powder
  • 1 tsp cornstarch
  • 1/4 tsp salt
  • 1/2 tsp instant coffee granules
  • 1 tbsp date paste (or replace with more honey)
  • 3 tbsp honey
  • 1/3 cup plain yogurt (greek, soy, coconut, etc)
  • 2/3 cup pumpkin puree
  • 1/4 cup milk
  • 1 tsp vanilla extract
  • 1 tbsp coconut oil
Frosting:
  • 1/2 banana, mashed
  • 1 tbsp yogurt
  • 1 tbsp cocoa powder
  • 2 tbsp milk
Preheat oven to 350F.  Mix together all dry ingredients (not in frosting) in a large bowl.  Add wet (again, not ingredients in frosting) and mix again until a thick batter forms.  Scoop into greased donut hole/mini muffin pan.  Bake in preheated oven for 12 minutes.  Meanwhile, mix together all frosting ingreidents in a small bowl.  When brownies are done, remove from oven and let cool completely.  When cool, remove from pan. It's time to add the frosting.

First, use a fork to poke a small hole on top of the brownie.


Use your finger to deepen the hole a bit so that a decent amount of frosting can fit inside.  Then use a the same fork to place some of the frosting in the hole.


Top the brownie with a bit more frosting, and voila, you're done!  Repeat with all the brownie bites and place in the fridge until serving (frosting will harden the longer it's left to sit).  Recipes makes 24 brownie bites.


Revisited Recipe of the Day:

Crazy Ingredient Brownies


Pin It!

Wednesday, February 20, 2013

Nutella Oat Balls

You know those commercials that advertise Nutella as a healthy breakfast?

They make me laugh.


How is it that slathering a chocolate spread filled with sugar and fat on top of whole wheat toast can be considered good for you?  It's like dressing your salad with chocolate sauce at dinner and calling it a healthy meal.

Ummm... how about no?


Buuuuut, these Nutella Oat Balls just may deserve a yes.  Made with the healthy Date Sweetened Nutella recipe I shared last week, quick oats, and silken tofu they're definitely much closer to a healthy breakfast choice than that advertised on TV.

Oh yeah, and they're pretty darn tasty too.


Nutella Oat Balls

  • 120 g mori-nu silken tofu
  • 1/4 cup Date Sweetened Nutella (you can use normal as well, but it will take away from the health benefits)
  • 1/2 tsp vanilla extract
  • 1 tbsp special dark cocoa powder
  • 1 tbsp honey
  • 2 tbsp milk
  • 2 cups quick oats (If you only have normal oats, just pulse them in a food processor or blender a bit to break them up before using)
  • 1/3 cup chocolate chips
Combine all ingredients up to milk (this includes milk) in a food processor or blender and blend until smooth. Place quick oats in a large bowl.  Pour wet ingredients into oats and mix until entirely incorporated.  Mixture will be dry at first, but just continue mixing and it should all incorporate.  Mix in chocolate chips.  Form into small balls and store in fridge.  Makes 20-30 small balls.


Other than breakfast, these little guys are great as pre-workout fuel, a light dessert, or a yogurt topper when crumbled.

And given that they only take 5 minutes of your day to make, I'd say that you absolutely have no reason not to make these adorable little balls.  Soooo... get mixing!

Revisited Recipe of the Day:

Peanut Butter Pumpkins (leave off the peanut butter coating and chocolate for a recipe very similar to this one)


Pin It!

Monday, February 18, 2013

Peanut Butter Chocolate Fudge Bites


Peanut Butter.

Peanut Butter.

Peanut Butter.


Why yes, I am going to ramble on about peanut butter for the second post in a row.  Deal with it.  Or, if you prefer, just skip down to the recipe at the bottom, because these things really are good.

Ok, back to the peanut butter.


Would you believe me if I told you that a couple of months ago I didn't like peanut butter at all?  Well, it's true.  Peanut butter was one of those foods that I would pass up every single time, even if there was chocolate involved.  To this day, there are still some things I don't like with it.  Resse's, for example, aren't quite my cup of tea.

But these Peanut Butter Chocolate Fudge Bites?  I can inhale them by the dozens.


But, come one, they're so good I bet anyone could.

A sticky peanut butter layer made from Chex and rice crispy cereal, followed by a thin layer of sweet date puree, and then topped off with a rich chocolate mousse.  And then you pop it all in the freezer to make it even more fudgy and sticky and awesome.

Like I said, I bet anyone would have trouble stopping at just one.  But then again, you may have to see it to believe it.  In that case, I suggest you begin to gather your ingredients!


Peanut Butter Chocolate Fudge Bites
Peanut Butter Layer:

  • 1 cup rise crispies
  • 2 1/2 cups Chex cereal (rice, corn, wheat, etc)
  • 100g silken tofu
  • 2 tbsp peanut butter
  • 2 tbsp honey
  • 1-2 tsp milk (if needed to help blend)
Date Layer:
  • 2 tbsp date paste (pureed date)
  • 4 tsp milk
  • 1/4 tsp vanilla
Chocolate Mousse Layer:
  • 200g silken tofu
  • 2 tbsp milk
  • 1 tbsp special dark cocoa
  • 1 1/2 tbsp maple syrup
  • 1/4 cup chocolate chips, melted
  • 1/2 tsp vanilla
  • 2 tbsp regular cocoa powder
Line an 8x8 square pan with enough parchment paper to cover sides.  In a large bowl, combine cereals.  In a blender, mix together remaning ingredients for Peanut Butter Layer.  Blend until smooth.  Pour wet ingredients into the cereals and mix until a cereal is coated with mixture.  Press into the bottom of prepared pan.
In a small bowl, combine all ingredients for Date Layer.  Spread on top of cereal layer.
Combine all ingredients for Chocolate Mousse Layer in a blender and blend until completely smooth and creamy.  Scoop on top of date layer and spread around evenly. 
Place pan in freezer until mousse layer is hard.  Once hard, remove from freezer and cut into (16) small sqaures.  Freeze again until just before serving time.


Are you running to your kitchen yet?

Revisited Recipe of the Day:

Double Peanut Butter Cookies for One


Pin It!

Saturday, February 16, 2013

Whole Wheat English Muffins

If I learned one thing from this recipe, it's that toasted English Muffins taste really good with warm peanut butter.  Really good.


Call me crazy, but I've always overlooked English Muffins.  I mean, they're sorta boring, right?  People always put jam on them to make them good, and I'm not really a jam person, so I didn't really know what to do with them.  Well, I know now.

Two words: Peanut Butter.


Oh my god, so good.   It's all melty, and sticky, and just plain yummy.  Can you guess where all my homemade English Muffins went?

Yeah, along with all my Peanut Butter.


Ok, so let's talk about the actual recipe I'm sharing today.  It's one for Whole Wheat English Muffins.

They're tasty, they're healthy, they're surprisingly easy.  You should make them and then slather peanut butter on top.  Enough said.


Whole Wheat English Muffins

  • 1/2 cup warm water (115F)
  • 1 tbsp honey
  • 2 tsp active dry yeast
  • 2 cups spelt flour (or all purpose)
  • 3/4 cup whole wheat flour
  • 1/4 cup rolled oats
  • 1/4 cup wheat bran
  • 1 tsp coarse salt
  • 2 tsp ground flax
  • 1/2 cup buttermilk
  • cooking spray
  • 1/4 cup cornmeal
  1. Combine warm water, honey, and yeast in a large bowl.  Let stand for 5 minutes or so, until yeast has dissolved.  In another bowl, mix together flours, oats, wheat bran, salt, and flax
  2. Add dry ingredients to bowl with yeast.  Pour buttermilk into yeast bowl.  Mix until flour is almost completely incorporated.
  3. Turn mixture onto a well floured surface and knead until a smooth ball of dough forms.  
  4. Lightly coat a large bowl with cooking spray.  Place dough in bowl, cover with a damp cloth, and let rise until doubled in size, 1-2 hours.
  5. Turn out dough onto a lightly floured surface and knead for another 1-2 minutes.  Roll out dough to a 1/2" thickness.  Use a 3-inch round cutter (I used the top of a cup) to cut out rounds of dough.  Continus to roll out and cut the scraps until all dough has been used.
  6. Place rounds on a baking sheet, cover with plastic wrap, and let rise until puffy, about 20 minutes.
  7. Heat a large griddle or 12 inch skillet over low heat.  Dust rounds with cornmeal before placing on griddle in batches of 3-4.
  8. Cook for 8-10 minutes on each side, until dry anf slightly browned.  Let cool at least 30 minutes before slicing.
  9. English muffins will keep for about a week in the fridge.
Revisited Recipe of the Day:

Lemon Zucchini Bread


Pin It!

Thursday, February 14, 2013

Chocolate Strawberry Cupcakes for Two

Happy Valentines Day!


This is a scheduled post, so right now I'm probably shoving chocolate into my face somewhere.  Have I mentioned how much I love Valentines Day... and chocolate?  Yes?  Oops.

Well, I also love single serving recipes.  They're so easy and yummy and don't require cleaning a lot of stuff after you make them.  I definitely don't love cleaning.


This recipe that I'm sharing today isn't a single serving one, but instead something even better for Valentines Day.  A chocolate cupcake recipe that serves two.  One for you, and one for your special someone.  By the way, the "special someone" can be you also.  That's totally fine.  There's nothing wrong with a double dose of chocolate.

Look how gooey!
You know something else? These cupcakes are filled with strawberries.  So romantic, right?  Chocolate and strawberries are like the most romantic combination.

And I'm also pretty proud of the frosting on these babies, 'cause it's made with the middle of the cupcake. Isn't that so awesome?  Absolutely no wasting chocolate here!  That would be a crime.

So, yeah, make these cupcakes.  They take 5 minutes and they're really yummy and you can share them with your valentine or eat both by yourself and there aren't many dirty dishes to clean.  Ummm...  yes please?


Chocolate Strawberry Cupcakes for Two
Cake:
  • 1/4 cup spelt flour
  • 2 tbsp +1 tsp cocoa powder
  • 1/2 tsp baking powder
  • 2 tbsp applesauce or yogurt
  • 1/4 cup milk
  • 1/2 tsp vanilla 
  • 1 tbsp maple syrup
  • 1 tbsp chocolate chips
Frosting:
  • center of both baked cupcakes from above (details below)
  • 1 tbsp yogurt
  • 1 tsp cocoa powder
  • 1 tsp milk
  • 1 tbsp mashed banana
Filling:
  • 2-3 strawberries (fresh or frozen), chopped
Preheat oven to 350F.  In a small bowl, mix together first 3 cake ingredients.  Add in applesauce/yogurt, milk, vanilla, and maple syrup, and mix until a smooth batter forms.  Fold in chocolate chips.  Pour batter into two cupcake liners and bake for 15-20 minutes, until a toothpick comes out clean.  Remove from oven and let cool completely.  Once completely cooled, cut out the center of the cupcakes, but do not eat or throw them out.
In another small bowl, combine the centers of the cupcakes, along with the remaining ingredients for frosting. Set aside.
Fill the cupcakes with the chopped strawberries, and cover with the frosting you just made.  
Enjoy!


Have a chocolate covered day everyone!

Revisited Recipe of the Day:

Mini Carrot Cake (for One)


Pin It!