
Wait! Don't close the page yet! I promise this stuff is much more appealing than it sounds or looks. Even you raisin haters, stay tuned. I'm about to introduce you to something that very well may change your (baking) life.


This, my friends, is Raisin Puree.
Though it may not look like much, it's a great ingredient to have on hand whenever you're attempting low sugar baking. And in my case, that's a whole lot of the time. Let me tell you, this stuff has been a real game changer.
Made simply from raisins and water, it's super sweet and perfect to mix into any baked good or whatever else you're cooking. And don't worry if you don't like raisins, as long as you don't use too much, it doesn't taste of them at all. However, I happen to like raisins, and sometimes use a lot to make the taste more obvious. It's completely up to you.
So how do you make it?
Well, it just so happens that I've got a handy dandy detailed step by step picture guide to show you. Let's get started.

1. You start with some of these guys. Thery're just plain old raisins and will be the base of your raisin puree. I used Thompson Seedless Raisins, which I got from Trader Joes. I'm sure any brand would work fine, as long as they're seedless and dark (not yellow raisins).

2. You now load a whole bunch of raisins into a jar of your choice. I used a pretty big one. The only thing I'd cauting against is using a really small jar, because you'll be pureeing the raisins later, and want to make sure there's enough for it to blend easily. Leave a bit of space between the top of the jar and where the raisins are, they shouldn't be overflowing.

3. Fill up your jar with water until the water is completely covering the raisins. Don't add any more water than you need to, or the texture of the puree may be too thin. Put a lid on the jar and place it in the fridge for at least 24 hours. This makes the raisins a lot easier to blend.

4. After the raisins have been sitting for at least a day, remove them from the fridge. They should be all nice and plump, like in the picture above. Isn't it cool how that happens? I've heard people plump their raisins before adding them to cookies, but I've never tried it.

5. Empty out the jar into the bowl of your food processor (a blender may work too, but I haven't tried). You don't have to drain the water or anything, just dump in everything.

6. Let's get blending! The picture above shows what the puree will look like midway through the process. You don't want it to be that chunky in the end. It may take a couple minutes of on and off processing to achieve the right texture.

7. This is what your puree looks like when it's done. It's still a bit lumpy, I suppose, but smoother than the other picture. The constistency of your puree may vary a bit depending on how much water you used. That's fine. It shouldn't really matter much when you start to bake with it.

8. Transfer your puree back into the jar. It really condenses a lot so your jar won't be full anymore. Store it in the fridge for up to a month. Raisin Puree works great as a sweetener for baked goods. It would probably be great in a no bake cookie or oatmeal dish too, if you're a raisin fan and want a more prominent flavor.
I have some recipes I'm planning to post soon, too. Stay tuned!
Revisited Recipe of the Day:
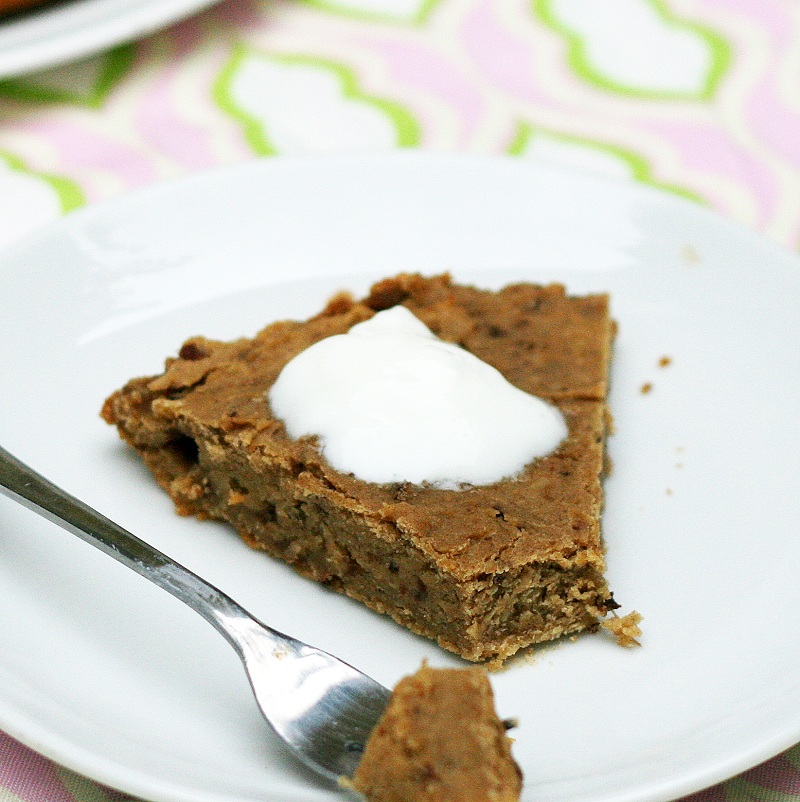
Oatmeal Raisin Cookie Cake

Made simply from raisins and water, it's super sweet and perfect to mix into any baked good or whatever else you're cooking. And don't worry if you don't like raisins, as long as you don't use too much, it doesn't taste of them at all. However, I happen to like raisins, and sometimes use a lot to make the taste more obvious. It's completely up to you.
So how do you make it?
Well, it just so happens that I've got a handy dandy detailed step by step picture guide to show you. Let's get started.

1. You start with some of these guys. Thery're just plain old raisins and will be the base of your raisin puree. I used Thompson Seedless Raisins, which I got from Trader Joes. I'm sure any brand would work fine, as long as they're seedless and dark (not yellow raisins).

2. You now load a whole bunch of raisins into a jar of your choice. I used a pretty big one. The only thing I'd cauting against is using a really small jar, because you'll be pureeing the raisins later, and want to make sure there's enough for it to blend easily. Leave a bit of space between the top of the jar and where the raisins are, they shouldn't be overflowing.

3. Fill up your jar with water until the water is completely covering the raisins. Don't add any more water than you need to, or the texture of the puree may be too thin. Put a lid on the jar and place it in the fridge for at least 24 hours. This makes the raisins a lot easier to blend.
4. After the raisins have been sitting for at least a day, remove them from the fridge. They should be all nice and plump, like in the picture above. Isn't it cool how that happens? I've heard people plump their raisins before adding them to cookies, but I've never tried it.
5. Empty out the jar into the bowl of your food processor (a blender may work too, but I haven't tried). You don't have to drain the water or anything, just dump in everything.

6. Let's get blending! The picture above shows what the puree will look like midway through the process. You don't want it to be that chunky in the end. It may take a couple minutes of on and off processing to achieve the right texture.

7. This is what your puree looks like when it's done. It's still a bit lumpy, I suppose, but smoother than the other picture. The constistency of your puree may vary a bit depending on how much water you used. That's fine. It shouldn't really matter much when you start to bake with it.

8. Transfer your puree back into the jar. It really condenses a lot so your jar won't be full anymore. Store it in the fridge for up to a month. Raisin Puree works great as a sweetener for baked goods. It would probably be great in a no bake cookie or oatmeal dish too, if you're a raisin fan and want a more prominent flavor.
I have some recipes I'm planning to post soon, too. Stay tuned!
Revisited Recipe of the Day:
Oatmeal Raisin Cookie Cake

Looking forward to trying this.
ReplyDeleteI wonder, too, how craisins might work with this method...
I've got no idea what would happen, but I am LOVING the idea. I think I see a cranberry puree in my future!
DeleteI plan to try it to add to a smoothie.
ReplyDeleteThat sounds like a great idea :)
DeleteAnyone have ay recipes that incorporate the raisin puree
ReplyDelete?
Thankss great post
ReplyDelete