Wednesday, October 31, 2012

Pumpkin Whoopie Pies with Maple Yogurt Filling

Though I don't believe I've mentioned it before, I'm a big fan of whoopie pies.


But, c'mon, who isn't?

They're just so lovable!  2 pieces of fluffy cake, with creamy frosting sandwiched between, and totally portable, too.  In my opinion, whoopie pies are even better than cupcakes because you get a taste of both frosting and cake with each bite.  (Please don't tell me I'm the only one who always ends up eating all the frosting before I'm finished with the cake.)


And these paricular whoopie pies, though they're much healthier than most you'd find in a bakery, definitely live up to their name.  In fact, they came out even better than I had expected... and I had pretty high hopes for these guys.

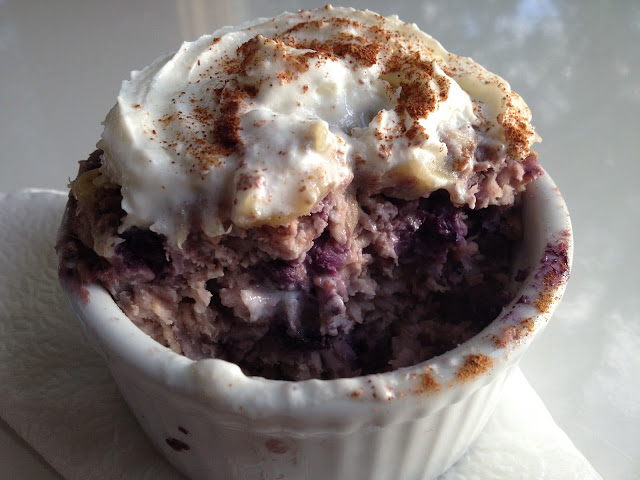
The pumpkin cake is super moist, despite being low fat, and the yogurt filling has the absolute perfect tangy to sweet ratio.  Combined they created two little bites of heaven.  Of course I had to have seconds.


If you're still not convinced that you have to have to have to make these, what if I tell you that one of my taste-testers said that these whoopie pies were one of the best things I've ever made?  Does that help?  I don't want to sound braggy or anything, but I've made some pretty yummy stuff!

Plus, they're not even hard to make.  Or at least, not any harder than another baked good.  All you do is mix up your ingredients, then drop the batter onto a cookie sheet.  No special equipment needed.  I was sort of surprised myself with how easy it was.


So, now that you have all those awesome facts floating around your brain, I hope that you've decided to make these.  In fact, I hope you're not even reading this now because you've skipped down below to the recipe.  However, for those of you still reading, I shall not put any more distance between you and this awesome recipe.  Read on!

Mini Pumpkin Whoopie Pies with Mape Yogurt Filling
(makes about 10 whoopie pies, depending on size)
  • 1/4 cup milk
  • 1 tsp apple cider vinegar
  • 1/2 cup oat flour (grind down oats to a fine powder in a coffee grinder or food porcessor to make your own)
  • 1/4 tsp baking soda
  • 1/4 tsp ground ginger
  • 1 tsp baking powder
  • 1 tsp cinnamon
  • pinch salt
  • 1/8 tsp allspice
  • 2 tbsp brown sugar
  • 1/4 cup pumpkin
  • 1/2 tsp vanilla extract
  • 1 tbsp maple syrup
  • 1/4 cup plain greek yogurt (vegan yogurt, greek or otherwise, will work too)
  • 1/4 tsp cinnamon
Preheat oven to 350F.  Mix together milk and vinegar in a small bowl and set aside.  In another larger bowl, mix together next eight ingredients (through brown sugar).  Then add pumpkin and vanilla to bowl with milk, and stir to combine.  Pour wet ingredients into dry and mix until well combined.  Drop batter onto greased cookie sheet (or sheets, if you run out of room) in circles about the same size as each other (it doesn't have to be perfect).  Bake for 7 minutes.  While cakes bake, mix together the last three ingredients (maple syrup, yogurt, and cinnamon) in a small bowl.  When cakes come out of the oven, let cool, and then spread the yogurt mixture on 1 cake piece, and top with another.  Repeat until all whoopie pies are made.  If there's an extra side leftover, I recommend you eat it :)


Now that that's done with, I have something very important to say...

Happy Halloween!

I didn't have any more Halloween themed recipes to share today, but I do wish you all a great night of trick-or-treating and/or handing out candy.  You can bet I'll be having a whole lot of fun!

(And don't worry if you end up with 50 thousand pounds of candy, I plan on posting a whole bunch of recipes that use leftovers)


Revisited Recipe of the Day:

Peanut Butter Pumpkins


(a recent recipe, I know, but it's absolutely perfect for Halloween, so I couldn't resist.)
Pin It!

Monday, October 29, 2012

Grain Free Lentil Crackers

Grain Free Crackers.


Doesn't that sort of sound like an oxymoron?

I mean, crackers are usually so grain filled, for them to lack any grains at all just seems so... backwards.  But, oh well.  I suppose it doesn't really matter as long as the taste is good, right?


And the taste is good.  Great even, if you're a savory cracker fan.  Especially with a thick slather of cream cheese on top.  Mmmmmm...


I actually had no idea these crackers would turn out so nicely.  When I made them I was sort of rushing, so that I could get something lentil-y done in time for today's MMAZ post, and just started throwing a whole bunch of ingredients into my food processor and blending.  Stopping every minute or so to taste.

It didn't really help that savory recipes aren't exactly my strongsuit.  I much prefer sweet, but with the ingredient lentils, that didn't quite seem like an option.

Lentil cookies = ewwww!


Luckily, I somehow created these crunchy little crackers from all my random-ness in the kitchen.  And now, because I somehow managed to keep track of everything I added to the dough, I have the recipe to share with you all.  Happy Meatless Monday!


Grain Free Lentil Crackers
  • 1/4 cup chickpea flour
  • 1/3 cup cooked lentils
  • 1 tbsp sunflower seeds
  • 1 tbsp ground flax
  • 2 tbsp balsamic vinegar
  • 2 tsp coconut oil (or a different type of oil)
  • 1 tsp water
Preheat oven to 300F.  Combine all ingredients in food processor and blend until combined, and no large clumps remain.  Break mixture into small, thin pieces and place pieces on a parchment paper lined baking sheet.  Bake for 20 minutes.  Then, turn oven off and crack open door, but leave crackers in to crisp up a bit.  After 10 minutes remove crackers from oven.  Store any leftovers in an airtight container.


Ok, so go cook up a big pot of lentils, make these crackers, then head on over to Better with Veggies to find out what other yummy stuff you could make with your lentils.

MMAZ Better With Veggies
Have a great day!

Revisited Recipe of the Day:


Pin It!

Sunday, October 28, 2012

Cookie Butter Cups

Move over Reese's...


'Cause here come Cookie Butter Cups!

That's right, the deliciously addictive spread has now been turned even more deliciously addictive, by sandwiching it between rich dark chocolate.


I ate three straight from the freezer.  Whoops.  I couldn't help myself.  These cups are just so yummy.  

Seriously, they blast Reese's right out of the water.  Soon, kids will be asking for these instead of the famous peanut butter cups on Halloween night.

Which is actually totally fine, because, unlike most popular candies on the market, these treats are made with only 5 ingredients, all of which are pronounceble.  So you see, it's a win, win.  Better nutrition, better taste.


Do yourself a favor and, whether you want to be the person to introduce Cookie Butter Cups to the world or just want to try the delicious-ness I'm raving about, get a little bit ahead of the game and throw together these delightful little treats for Halloween this year.  I swear they'll be gone in an instant.


Chocolate Cookie Butter Cups
(makes 10 mini cups)

  • 1/4 cup cocoa powder
  • 1/4 cup coconut oil, melted
  • 2 tbsp maple syrup (you can add more of you have a sweet tooth)
  • 1/2 banana
  • 1-2 tbsp speculoos cookie butter
Combine first 3 ingredients in a small bowl and stir until it turns into a smooth chocolate sauce.  Pour a thin layer into mini cupcake liners (or regular cupcake liners, or molds), making sure to leave some of the sauce for later.  Freeze cupcake liners for 10 minutes, or until chocolate has hardened.  Meanwhile, microwave the banana and cookie butte together in a small bowl until easily stirred.  Mix well.  Put a blob of cookie butter micture on top of chocolate layer in each mini cupcake liner, and cover with another thin layer of chocolate sauce.  Freeze again until hard.  Then, store in freezer or fridge until serving time (personaly, I like them more straight from the freezer).


Wow, writing this post really made me want to eat more of these.  I'm off to go grab the last one... and then most likely make more.  Oh my are they delicious.

Just a few more notes before I go off to devour a Cookie Butter Cup:
  • Speculoos Cookie Butter is, in fact, vegan.  Meaning that these Cookie Butter Cups are vegan as well.  Vegans, rejoice!
  • For the super easy version of this recipe, just melt down some of your favorite chocolate (i recommend good quality dark chocolate), and use that instead of the coconut oil chocolate sauce
  • For a lower calorie version of this recipe, you could try substituting stevia for the maple syrup.  I haven't tried this, however, and am not sure about how the taste would be or what amount would be best to use.
Without further ado, I send you off to your kitchen to mix up some of this utter yumminess.  

Enjoy!


Revisited Recipe of the Day:


Pin It!

Saturday, October 27, 2012

Apple Greek Yogurt Cheesecake

Currently I'm at that stage where I've got 10 million apples lying around and nothing to do with them.


Basically, in an attempt to use them before they all turn to mush, I've been throwing them into pretty much everything I make.

Dinners, desserts, snacks, you name it.  Unfortunately, only a small handful of those experiments actually work out into something worth sharing.  This cheesecake, however, is probably worth every single failure.  It is so good.


I'm actually not really a fan of classic cheesecake.  It's a bit too heavy for me.  I know there are some hardcore cheesecake lovers out there, though, so I decided to try my hand at making something similar.

My main goal was to create something that would satisfy both me, and everyone who enjoys cheesecake, and I really think I did it.


This version of a cheesecake, made with greek yogurt and apple, is very light, but also has the rich and creamy taste that is associated with the classic dessert.  There's just a hint of sweetness from the apples and honey, and a touch of tangy from all the greek yogurt.  If you don't like your cheesecake tangy, feel free to add more honey before baking.

Oh, and I almost forgot to mention, there's another unusual ingredient in this dessert that helps to add creaminess and good texture.  Scroll down to find out what it is!


Apple Greek Yogurt Cheesecake

  • 1 1/2 cups greek yogurt (I used 0%, but for an even creamier version use 2%)
  • 9 tbsp mori-nu tofu (1/2 cup + 1 tbsp)
  • 1 cup chopped apples
  • 1 tsp vanilla
  • 1 1/2 tsp lemon juice
  • 2 1/2 tsp cornstarch
  • 1/2 tsp cinnamon
  • 2 tbsp honey, or more to taste
  • optional: 1 prepared pie crust
Preheat oven to 350F.  Combine all ingredients (not pie crust, if using) in food processor and blend until smooth.  Taste to check sweetness, and add more honey (or other sweetener) if desired.  Once flavor is just how you want it, pour mixture into parchment paper lined circular pan or pie crust.  Bake in preheated oven for 30 minutes, then turn oven off, but don't remove cheesecake.  Let cake sit in oven for at least 1 hour before taking out, and moving, uncovered, to fridge.  Allow cheesecake to firm up even more by leaving in fridge overnight (or for at least 8 hours).  By the next day, you're ready to serve... for breakfast or dessert!


As you can see from the pictures, I chose to leave my cheesecake crustless.  This was mostly because I didn't have a pie crust on hand and was too lazy to make one.

Next time I make this (and there will most definitely be a next time) I think I'll give a graham cracker crust a try.  I think the added crunch + flavor would be really nice.

However, whether or not you use a crust is completely up to you.  The one thing I can say is that if you chose no crust, then you're definitely not missing out on the awesome-ness of the recipe, because that's what I did when I made it.

So, without further ado.... Enjoy!


Revisited Recipe of the Day:


Lemon Blueberry Scones


Pin It!

Thursday, October 25, 2012

Pumpkin Raisin Baked Oatmeal Bars

It really wouldn't be hard to have pumpkin in every meal of the day.


All you'd have to do is have pumpkin soup for lunch, a side of roasted pumpkin with dinner, a couple pumpkin raisin cookies as snacks, and a pumpkin square or two for dessert.  Oh right, and one of these bars for breakfast.


There are so many great things about these Pumpkin Raisin Baked Oatmeal Bars, I wouldn't be surprised if you find yourself grabbing two.

For one, they're completely delicious.  Pumpkin-y goodness with juicy raisins and just the right amount of chew from the rolled oats.  Yum.  Also, these bars are unbelievably filling.  If you pair one with some plain greek yogurt, it will keep you full for hours.  Seriously, there will be no grumbling bellies with these in your morning routine.

I also recommend these as a breakfast for anyone who finds themself rushing out of the door in the morning without breakfast.  Don't ever skip breakfast just because you're in a rush.  It results in a definite bad day.  Instead, grab one of these bars and eat it on your way to work.  See?  Problem solved.


I'm not usually one to eat the same breakfast multiple days in a row, but when I made these, on a Sunday, I had one every morning until they were all gone.

I remember that was a really busy week and I was often pressed for time in the morning.  These bars really came in handy then, because I froze them , and then just reheated one in the microwave each morning and gobbled it up with some yogurt.  It took like 2 minutes.  Please tell me you have 2 minutes in the morning to incorporate in some delicious-ness.


I'll go ahead and give you the recipe now before you get bored and stop reading.  This is not a breakfast to miss out on.

Pumpkin Raisin Baked Oatmeal Bars
(makes 9 large squares)
  • 2 cups rolled oats
  • 2 tsp cinnamon
  • 1/2 tsp ginger
  • 1/4 tsp allspice
  • pinch cloves
  • large pinch salt
  • 1 cup pumpkin puree
  • 1 2/3 cup milk of choice or water
  • 2 tsp maple syrup, or to taste
  • 1 tsp vanilla extract
  • 1/3 raisins
Preheat oven to 380F.  Combine all dry ingredients (not raisins) in a large bowl and mix well.  Add in pumpkin, milk/water,  maple syrup, and vanilla.  Stir to combine.  Mix in raisins.  Mixture with be wet and may not hold together.  Pour into greased 8x8 pan and bake for 20-25 minutes, or until oatmeal is firm.  Let cool before cutting.


So here's what all you busy, breakfast missing people should do:

Throw together these bars Sunday afternoon.  Cut them into squares.  Then, either freeze them if you like warm breakfasts, or just leave them in the fridge if you don't care.  Each morning, before sprinting out the door because you're late for this or that, reheat/grab a bar and you're good to go.  It's super easy and way healthier than going without anything.

Enjoy!


Revisited Recipe of the Day:

Baked Oatmeal Blueberry Muffin


Pin It!

Tuesday, October 23, 2012

Peanut Butter Pumpkins


Halloween snuck up on me this year.

I feel like it was just a couple of weeks ago that october was beginning and Halloween was still a good thirty days away.

Now it's in less than 2 weeks and, despite the fact that I've been running around like a mad-women trying to prepare some halloween themed recipes for you all, i'm excited.


Halloween is a time for costumes, parties, and, oh right, lots and lots of candy.  That's probably the part most people (or at least kids) look forward to. 

Personally, i'm not a huge fan of fruit flavored candies, but those fun-sized chocolate bars?  Well, they're another story.


I have a thing for mini desserts, and an even bigger thing for chocolate, so when the two are combined dangerous things happen at my house.  As in, some of the other family members mysteriously misplace they're candy bars... and I suddenly gain more.

I really like them, ok?  So much, in fact, that when I started to think up Halloween recipes to make, something inspired by those little guys was definitely the first idea to come to mind.

Of course, always the overachiever, I also wanted something that looked Halloween-y.  That's how these Peanut Butter Pumpkins came to be.  They're mini and contain chocolate, just like my beloved halloween bars, but, as an added bonus, they're also shaped like cute little pumpkins.

They came out quite nicely, if I do say so myself.


Peanut Butter Pumpkins
  • 1/2 cup peanut butter
  • 1 tbsp honey or agave nectar
  • 1/2 cup rolled oats
  • 1 tbsp ground flax
  • peanut butter chips, for melting
  • a couple squares of your favorite chocolate
Melt the peanut butter and honey together in a small microwavable bowl until easily stirred.  Mix until well blended.  In another bowl, combine oats and flax.  Pour the peanut butter mixture into the oat mixture and mix together.  It may seem dry at first, but just keep mixing.  Form the now combined mixture into balls and place on a plate.  Chill in freezer overnight.  The next day, melt peanut butter chips in a small bowl (I used a ramekin).  If desired, thin the mixture with a bit of milk (I did this).  Using a toothpick, fork, of your hands if you don't mind getting a bit messy, dip the frozen peanut butter balls into the melted peanut butter chip and twist a bit to coat.  Set back on plate.  Repeat with each ball before returning them to freezer to let peanut butter coating harden (about an hour or so).  Once hardened, cut chocolate pieces into rectangular chunks and place on top of balls to make pumpkins.  You may have to melt the bottom of the chocolate a bit to get it to stick on top.  Return balls to freezer until serving time.

Note:  If you want, after attaching the chocolate stems on top of the pumpkin, you can also melt down some chocolate and paint on a jackolantern face with a small paintbrush or toothpick.  As you can see in some of the pictures, I did this on a couple pumpkins.


Aren't they adorable?

I wouldn't say that these little guys are something you should serve if you want to scare your party guests, but if you want them to smile, well, then these are the perfect choice.

Just watch as everyone devours them with a huge grin on their face!

Revisited Recipe of the Day:

Chocolate Banana Cups


Pin It!

Sunday, October 21, 2012

Carrot Cake Cookie Bites: My First Recipe ReDux!

This is a very exciting post for me.

Why?  Because it's my first Recipe ReDux recipe!


That's right, this girl is officially on the team!  And guess what?  The theme this month could not have been more perfect for me!  Orange foods!  I swear I read it and started jumping up and down.

Anywho, I decided to go any surprise everyone by not doing something with pumpkin.  My apologies if anyone was looking forward to that, but I'm a bit pumpkin-ed out (there are a bunch of revcipes on the way using it).  Instead, I decided to create a recipe that uses what I think is a much more overlooked fall ingredient: Carrots.


Carrots are a great ingredient, both because of their versitality, and because of the many health benefits they offer.

Not only are they good for the eyes, they can also help to prevent cancer and aging, keep your skin looking great, and even clean your teeth and gums!

It look like carrots are out to save the world, huh?  Reading through all their nutritional benefits, I sure thought so.


Moving on... Just because I strayed a bit from the norm by choosing carrots, did not mean I was going to go way out of my (recipe creating) comfort zone.  Therefore, I did not use my carrots to make something savory.  Instead, I ended up creating a highly snack-able carrot cake cookie.


Carrot Cake Cookie Bites
  • 1/2 cup rolled oats
  • 1/2 tsp baking powder
  • 1/2 tsp cinnamon
  • 1/4 tsp ginger
  • pinch cloves
  • pinch allspice
  • 1/2 cup shredded carrots
  • 2 tbsp honey (or agave)
  • 2 tbsp water (or milk)
  • 2 tbsp ground flax
  • optional: If you want sweeter cookies, add a tsp or two of brown sugar
Preheat oven to 375F.  Combine oats and spices in a medium bowl.  Mix in honey, water, carrots, and sugar if using.  Stir in flaxmeal.  Form into small balls on sprayed baking sheet.  Bake in oven for 9 minutes.  Let cool before serving.


On top of the amazing (and spicy) taste, these cookies are pretty darn good for you, too.  Honey is used to sweeten and they're also completely flour, oil, and fat free.  I swear they don't feel like deprivation though.  All you taste when you bite into them is sweet carrot, spicy ginger, and a whole lot of YUM.


So, enjoy them.  Make them now, and then pop a few into your mouth whenever you need a quick snack.  Or maybe crumble one into some yogurt for breakfast.  Possibly drown a couple in milk (or melted chocolate??) for a midnight snack.  Or, you know, just watch as your family members sit down and eat them all in a total of 5.4 minutes.

On second thought, maybe you should just grab some while you can... and hide.

Revisited Recipe of the Day:

Pumpkin Raisin Oatmeal Cookies


Pin It!