Pages

Thursday, January 31, 2013

Cinnamon Pita Chips with Lemon Yogurt Dip

Sometimes I buy foods, but then never eat them.  They end up going sour, stale, or moldy.  Bleh.


I mean, really, where on Earth did that bag of pita bread come from?  I swear I did not buy it.  But, yet, there it was, sitting in the kitchen drawer, dangerously close to going stale.

What to do?


I don't know if I've mentioned how much I hate wasting food, but it's true.  It drives me nuts.  But at the same time, I don't want eat food that's already gone bad.  Who wants to do that?

So, you see, I was in a bit of a pickle that day.  I had a big bag of pita bread going stale and nowhere to use it.  Until, I came up with an idea.


It was time to make pita chips.  And so I did.

They came out just fantastic!  Never more shall bread go stale at my house, not when something so delicious can come out of it!

And, thus, my no waste self is satisfied.  I hope you will be too.


Cinnamon Pita Chips with Lemon Yogurt Dip
For Chips:

  • 130 g pita bread
  • 1 tsp cinnamon
  • 1/4 tsp vanilla extract
  • 1 tsp coconut oil, melted
For Dip:
  • 1/2 cup plain or vanilla greek yogurt
  • zest of 1 lemon
  • 1 tsp lemon juice
  • 1 tsp honey, or to taste
Preheat oven to 400F.  Cut pita bread into triangles.  In a small bowl (a ramekin works well) mix together cinnamon, vanilla, and coconut oil.  Brush a bit of the mixture onto each pita bread triangle.  Place pita bread on a lined baking sheet.  Bake for 12-15 minutes, until slightly browned and crisp.  Store chips in an airtight container.  
To make dip, combine all ingredients in a small bowl, and mix until well combined.  Taste, and add more honey if needed.  Store dip in fridge.


If you're ever in a situation when you've got some pita bread, and nowhere to use it, then chips are definitely the way to go.  They're mega easy, mega yummy, and mega healthy as well.  Seriously, best almost stale bread experience ever.  And the dip?  It just takes it to the next level!  You've gotta make 'em, whether your pita bread's old or not.

P. S. It also works with tortillas :)


Revisited Recipe of the Day

Cheesy Star Chips  (a great use for tortillas)


Tuesday, January 29, 2013

Double Chocolate Cookies

I am a cookie monster.


No, really.  Every baked good coming out of my kitchen these days is a cookie.  And I bake a lot.

I'm not complaining though.  A cookie everyday is something I'm more than happy to deal with, and when each and every cookies is good-for-me, it's no crime to my health either.  A win, win situation.


But what is even better?  Chocolate Cookies!

And I'm not just talking chocolate chip.  No sir!  I'm talking deep, dark, cocoa powder loaded, deee-licious cookies with chocolate chips.  Oh, yes.


These here cookies are all that... and more.  You know, 'cause I haven't mentioned the 100% healthy part.

Loaded with milk chocolate chips, just a smidge of peanut butter, and, oh right, no gluten (!), these cookies are not something to miss out on.

And did I mention I also snuck in some spinach?  Shhhh....

Double Chocolate Cookies

  • 2/3 cup + 1/2 cup oats
  • 2 tbsp peanut butter
  • 1 tbsp yogurt (soy, greek, etc)
  • 3 tbsp milk
  • 2 egg whites (6 tbsp)
  • 1/4 cup spinach (frozen or fresh, thaw if frozen)
  • 1/2 tsp baking soda
  • pinch salt
  • 1/3 cup cocoa powder
  • 3 tbsp maple syrup
  • 1 tsp vanilla
  • 1/3 cup milk chocolate baking melts (or your favorite chocolate chip)
Preheat oven to 380F.  Place oats in food processor and process until ground into small pieces.  Place in a large bowl and set aside. Combine peanut butter, yogurt, milk, egg whites, and spinach in a food processor and process until completely smooth.  Add baking soda, salt, and cocoa powder to bowl with oats.  Mix together.  Add spinach mixture to bowl, and mix again until well incorporated.  Add in maple syrup, vanilla, and baking melts.  Stir together until fully combined.  Scoop by 1/2 tbsp onto a greased cookie sheet.  Press flat with back of spoon.  Bake for 7-8  minutes.  I like these cookies best warm, but they're good room temp as well.


So just to clarify, these cookies are gluten free, as they're made from ground oats, really yummy, and pack in some veggies.  A pretty great package if you ask me!

So mix 'em up, steal some raw dough, and grab one straight from the oven while it's hot.  Enjoy everyone!


Revisited Recipe of the Day:


Cookie Butter Cups


Sunday, January 27, 2013

Mixed Grains with Kale and Apple

Welcome to dinner at my house.


This is pretty much what I eat most of the time... or at least a variation of it.

I absolutely love dishes that are packed with hearty grains, delicious greens, and sweet fruit.  If it were up to me, those types of foods would be the ones served in fast food restaurants, school cafeterias, and tons of dinner tables worldwide.  We gotta show people that healthy can taste good!


For real though, sometimes I wonder why simple salads, like the recipe I'm sharing today, aren't made more often.  I mean, it's not like they're complicated dishes to make.  I'm no master cook, and I threw this together pretty easily.  All you gotta do is toss some grains on the stovetop, cut up some apples, and then saute it all together with some kale.  My desserts are harder to make!


And do not tell me that people are hesistent to make this sort of thing because they think it won't taste good.  Oh, please.

Grains = delicious.  Apples = awesome.  Kale = even better.  So, c'mon, what on Earth leads one to believe that all of that combined is anything short of fantastic?

Answer = nothing.


Mixed Grains with Kale and Apple
Salad:
  • 1/2 cup red quinoa
  • 1/2 cup pearled barley
  • 1 medium onion
  • 1-2 tbsp olive oil
  • 2 apples
  • 6 (packed) cups kale, washed and cut into bite size pieces
  • 1/4 cup dried cranberries
Dressing:
  • 3 tbsp olive oil
  • 1 1/2 tbsp apple cider vinegar
  • 1/2 tsp honey
  • salt + pepper, to taste
Place quinoa in rice cooker along with 1 cup water and let cook until ready.  Repeat process with barley.  If you don't have a rice cooker, cook according to package directions, using same amount of water and quinoa/barley.  Cut onion into thin slices.  Saute with olive oil over medium heat for 5-7 minutes, until soft.  Add kale and apples and saute for another 10 minutes, until kale is wilted.  Mix in cranberries and grains and heat until warmed.
Make dressing my combining all ingredients in a small container, and shaking or mixing until very well combined.  Toss salad with desired amount of dressing (I used about half).  Serve warm.  Makes 4-6 servings as an appetizer, or 3-4 as a main dish.


If you still don't have faith in this dish, then all I can tell you is try it.  You will change your mind.  And if you don't, well, then I've got nothing to say to you.

Revisited Recipe of the Day:

Grilled Peach and Sausage Salad


Saturday, January 26, 2013

It's time to get honest.

You know what they say: Honesty is the best policy.

No, I haven't lied to you guys.  I've just chosen to leave out some of the details about me, my life, and why I started this blog.  You may have noticed that the About Me page on this blog is rather short and not descriptive at all.  I'm sorry.

You see, it wasn't exactly that I didn't want you to know, it was more like I wasn't quite comfortable sharing.  But now, as the one year anniversary of Mix it Up looms on the horizon, I think it's important to tell you who I (really) am.

The truth is, this blog is actually a partnership between me, a teenager, and my mom, a supporting parent.  I'm the one who takes the pictures, writes the posts, and dreams up the recipes, and my mom takes care of supplying ingredients, helping with some of the more advanced cooking, and anything that involves spending or accepting money.  It's real fun.

As for the reason for starting this blog, well it's a bit of a long story.  But you all deserve to know, so here it is:

I didn't used to care what I ate.  If it tasted good, I ate it (actually, that hasn't changed all that much).  Simple as that.  Sometimes my afternoon snack consisted of 4 bowls of goldfish, and sometime it was fresh blueberries.  Like I said, I didn't much care.  Then, and this is the somewhat clichéd part, I had health class in school.

There I learned about nutrition.  About My Plate, a balanced diet, and most importantly, the fact that eating healthy is important.  Not only is it good for you, it makes you feel good too.  That was all new information to me.

Soon, I decided that I wanted to change my eating style for that better.  My plan was to start paying attention to what went into my body.  I started liking vegetables (a trip to California was a big part of that), avoiding fast food, and just plain eating good.  But the problem was, I missed dessert.  I was cutting out everything that as much as looked like a sweet, and that left me with a feeling that I was missing something.

That was when I discovered some healthy eating blogs that helped to change my eating style yet again... this time for even better.  Those blogs included healthy dessert recipes that looked and sounded delicious, but also had ingredient lists that were pretty great nutrition wise.  To say I was excited was an understatement.  Not only did the blogs inspire me to bake healthy desserts, they also inspired me to start my very own blog to help other people know that it's possible to eat dessert and still be healthy.  And thus, Mix it Up was born.

Over time this blog has grown in ways I could have never imagined, and I am so proud.  My photography and recipe creating skills have grown immensely as well as my perspective on healthy eating.  There is now never a time when I feel like I'm cheating myself, even if that means that some nights require a handful of chocolate chips to feel satisfied.

So join me as, along with the help of my family, I discover what it really means to be healthy and happy.  I'm glad to have you along for the ride!

Edit:  I've updated my About Me page, too.  Check it out here, or click on the tab that says About Me and The Blog.

Friday, January 25, 2013

Not Your Average Blueberry Muffins

Blueberry muffins have a special place in my heart.


I can remember eating one by the beach on vacation, buying jumbo sized ones at the local bakery in town, and munching just on the muffin top while parading around the house as a five or six year old.

Because of those memories I've been hesitent to "re-do" or "healthify" the classic Blueberry Muffin.  I do, however, want a tasty substitute to satisfy any craving I may get, because, as you may know, despite the appearance of superfood blueberries, blueberry muffins cake be incredibly bad for you.


I came up with the perfect plan: Don't take on the classic jumbo blueberry muffin, but instead create a similar recipe with healthier touches, that can be eaten guilt-free at any time.  The result was absolutely delicious, and didn't hurt my fond memories one bit.  I give you...

Not Your Average Blueberry Muffins!


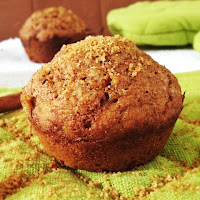
Like the title suggests, these muffins are definitely not your average ones.  If you were to walk into a bakery, I'm postive there wouldn't be a single blueberry muffin that tastes like these.  So, If you're looking for a remake of the classic treat, this may not be quite what you want.  However, if you'd like a healthier blueberry muffin recipe (or even just a muffin recipe) that won't ruin your diet, you need to read on.

These just may be the yummiest healthy muffins ever!


Not Your Average Blueberry Muffins

  • 1/2 cup spelt flour
  • 1/4 cup whole wheat flour
  • 1/4 tsp salt
  • 1 tsp baking powder
  • 2 tbsp ground flax
  • 2 tbsp turbinado sugar
  • 1 tsp vanilla
  • 1 1/3 cup frozen cauliflower, thawed
  • 3/4 cup + 2 tbsp milk
  • 3 tbsp yogurt (soy, greek, etc)
  • 1/2 tsp cinnamon
  • 1/8 tsp nutmeg
  • 1 tbsp maple syrup
  • 1/2 - 1 cup bluberries (frozen or fresh)
Preheat oven to 350F.  In a large bowl, combine flours, baking soda, salt, baking powder, flax, and sugar.  Mix together.  In the bowl of a food processor, combine cauliflower, milk, yogurt, spices, and maple syrup.  Blend until completely smooth.  Pour wet ingredients into dry, and mix until a smooth batter forms.  Fold in blueberries.  Scoop batte rinto greased muffin tins.  Bake in preheated oven for 30 minutes.  Makes 10 muffins.


Revisited Recipe of the Day:

Cinnamon Sugar Muffins


Wednesday, January 23, 2013

Chocolate Glazed Bundt Cake

When you walk into a bakery, or flip through a cookbook, there are alwasy some foods that catch your eye.


The almost too pretty to eat foods, the foods that make your mouth water, the foods that you can just see yourself digging into. 

I say this cake falls into all three categories.


I can see myself walking into a bakery, seeing a piece of this beauty on display, and asking for it right then and there.  Nevermind that it's also healthy.

You see, this cake's got a lot going for it.  It's a bundt cake so it's already prettier than other cake, but than it's also a mini bundt cake... and I'm sure you know that mini desserts are just so much better than normal sized ones.  Portion control in a cute little package, right?


But then, I went and made this cake even more mouth watering by adding that delicious chocoalte glaze you've seen in the pictures.

It's actually quite simple, just a mix of prune puree, cocoa, and egg whites, but it adds another dimension of flavor... and covers up any whole on the cake's surfacs.  Shhh... it's our little secret.

So what are you waiting for?  Scroll down and read the recipe, so you can dig into this delicious-ness yourself.


Chocolate Glazed Bundt Cake
For cake:
  • 1 cup spelt flour
  • 1/3 cup whole wheat flour
  • 1/3 cup cocoa powder
  • 1/3 cup extra dark cocoa powder
  • 1/2 tsp cinnamon
  • pinch nutmeg
  • pinch ginger
  • 1 tsp baking soda
  • 1 tsp baking powder
  • 3 tbsp ground flax
  • 9 tbsp water
  • 3/4 cup egg whites
  • 3/4 cup applesauce
  • 3/4 cup milk
  • 1/3 cup turbinado sugar
For glaze:
  • 1/4 cup prune puree
  • 1 tbsp extra dark cocoa
  • 1 tbsp egg whites
Preheat oven to 350F.  Combine dry ingredients for cake in a medium bowl.  In a small bowl, mix together flax and water, and allow to sit for a few minutes.  Whisk together flax mixture and all remaining ingredients for cake in a large bowl.  Slowly add dry ingredients to wet, whisking as you go.  Continue whisking until all flour in incorporated and batter is smooth.  Pour batter into a greased bundt pan.  It won't reach the top, but that's ok, that is what makes it a mini cake.  Bake bundt cake in preheated oven for 40-45 minutes, or until a toothpick comes out clean.  Let cake cool before removing from pan.
To make glaze, simply mix together all 3 ingredients (prune puree, cocoa, and egg whites) in a small bowl.  When cake has been removed from pan, pour glaze on top and use a spoon to spread it out until the whole top of the cake is covered.  Store cake in fridge.


This is definitely one of the best cakes I've made.  Though it's completely fat free, it's got the texture of a "normal" cake and is incredibly fudgy.  You can also freeze any leftover slices, and then reheat them in the microwave for an easy (and healthy) dessert on a busy night.  Sometimes you just need some chocolate.

Anyway, you need to make this cake some time.  It's, like, really good.  And that's all you need to know.


Revisited Recipe of the Day: 

Chocolate Zucchini Cake


Monday, January 21, 2013

Coconut Orange Chicken and Rice Soup

It's the 21st of the month everyone.  You know what that means...

It's time for the Recipe ReDux!


Like November's, the theme for this month really got my creative juices flowing.  In honor of the new year, and the chilly weather some of us have been having, we were supposed to pick a 'new' food trend predicted to take root in 2013, and turn it into a soup, stew, or one pot meal.

The food trend part was easy... or so I thought.  As I browsed through different trend prediction websites, I saw tons of new trends that I'd like to take on.  The only problem?  I didn't want to put any of them in a pot.

Popcorn stew?  No thanks.


Finally, I found something I was really excited to work with: Tea.  As mentioned on this page, tea is predicted to get super popular in the next year, and not just for drinking.  Well, seeing as I've already done it, I didn't cooking with it would be too hard.

And it wasn't.


This soup is actually super (or 'soup'er) easy, and is great to use up leftovers.  In fact, it came together partly because I needed to use up some leftovers in the fridge.  Cooked chicken... into the pot.  A half can of coconut milk... pour it in.  Two mandarin orange tea bags... rip 'em up and throw in the leaves (those weren't leftovers, but I had them lying around).

The result was a deliciously flavorful and incredibly easy twist on the classic Chicken and Rice Soup.  If you need a quick way to warm up a weeknight dinner, this soup is just what you're looking for!


Coconut Orange Chicken and Rice Soup

  • 2/3 cup brown rice
  • 1 1/3 cup water
  • 1 tbsp oil
  • 1 small onion
  • 1 cup cooked chicken, cut into bite size pieces
  • 1 inch fresh ginger, minced
  • leaves of 2 mandarin orange spice tea bags
  • 2 carrots, chopped
  • 4 cups vegetable broth
  • 7 oz (half can) lite coconut milk
  • juice of 1/2 lime
  • 1/4 cup mint leaves, finely chopped
  • salt, to taste
Place rice and water in rice cooker.  Turn on and let cook.  If you don't have a rice cooker, follow directions on rice package, using 2/3 cup rice and 1 1/3 cup water.  Saute onions with olive oil in a large saucepan over medium heat until translucent.  Add chicken and ginger and cook another 2 minutes.  Next add tea leaves, carrots, broth, and rice.  Cover and cook for 10-15 minutes, until carrots have softened.  Mix in coconut milk, lime juice, and mint leaves.  Season to taste with salt.  Ladle into serving bowls and serve hot.  Makes 4 servings.


Happy Recipe ReDux everyone!  Make sure to check out the link below for more delicious recipes!


Revisited Recipe of the Day:

Carrot Ginger Protein Soup


Sunday, January 20, 2013

Double Chocolate Whoopie Pies

You know how when you get something new, you just have to try it right then and there?


I've always been like that.  I get a present, a gift, a whatever, and I just have to do something with it as soon as possible.  Like, I actually have to.  If I don't, I get all antsy and feel like I'm missing something.  I'm not kidding.


So recently I got a whoopie pie pan as a gift.  I bet you know where this is going.

You would not believe how fast I raced into my kitchen.  Seriously, I had already made, photographed, and eaten something within 24 hours.


But there was a reason for the eating part.  Other than my weird gift accepting habit, I mean.  The whoopie pies I made were fantastic.  Knock your socks off amazing.  No way they're healthy good.  Worth a third serving delicious.  So yummy I had to call up the person who gave me the pan and thank them for a good 10 minutes.

And I hate talking on the phone.


Double Chocolate Whoopie Pies
For Cake:
  • 2/3 cup spelt flour
  • 1/3 cup whole wheat flour
  • 1/3 cup extra dark cocoa powder
  • 3/4 tsp baking soda
  • 1/2 tsp cinnamon
  • pinch salt
  • 1 tsp vanilla extract
  • 2 1/2 tbsp honey
  • 1/3 cup plain yogurt (soy works fine)
  • 1/2 cup applesauce or mashed banana (of using all applesauce, you may have to adjust sweetener)
  • 1 tbsp balsamic vinegar
  • 1/2 cup milk
For Filling:
  • 3/4 cup black beans (if from a can, rinse very well)
  • 1 tbsp nut butter of choice (I used peanut butter)
  • 1/4 tsp baking soda
  • 1/2 tsp vanilla extract
  • 1 tbsp extra dark cocoa powder
  • 2 tbsp milk
  • 1 tbsp maple syrup
  • 1/4 cup chocolate chips
Preheat oven to 350F.  Mix together flours, cocoa, baking soda, cinnamon, and salt from cake ingredients in a medium bowl.  In another bowl, combine vanilla, honey, yogurt, applesauce/banana, and vinegar (from cake ingredients).  Pour wet ingredients into dry and mix as best you can.  It will be dry.  Stir in 1/2 cup milk until a smooth, but thick batter forms.  If you have a whoopie pie pan, spread about 1 tbsp of batter into each cup.  If not, drop about 1 tbsp of batter onto a greased baking sheet (spread into a circle if necessary).  Continue until all batter has  been used.  Bake for 7 minutes, or until cakes have risen and are no longer wet (baking times may very depending on whether or not you have a whoopie pie pan).
While cakes are baking, make the filling.  Combine all ingredients for filling except chocolate chips in a food processor.  Blend until smooth.  You don't want any bean clumps remaining.  Add chocolate chips and pulse only until incorporated.  When cakes are ready, spread frosting on one cake and top with another.  Repeat until no cakes are left.  Store Whoopie Pies in fridge.


Enjoy!

Revisited Recipe of the Day:

Crazy Ingredient Brownies


Friday, January 18, 2013

What I'm Eating: January 2013


In honor of the New Year, I've decided to start a new sort of post on Mix It Up.  As you may have seen above, it's called What I'm Eating.  It's basically just what it sounds like.

Each month, I'll take the time to share 5-10 of my favorite foods/recipes/food products that I've been eating lately.  Normally it will be things that I've discovered after the previous post of What I'm Eating, but because this is the very first one, it will feature things that are from as long ago as I feel like.

So, without further ado, let's begin.  Below is What I'm Eating...


A brussels sprouts dish inspired by this recipe.  Sorry for the bad picture.
Roasted Brussels Sprouts - I never ever thought these little guys would become one of my favorite veggies, but, what do you know, they did.  I absolutely adore brussels sprouts, as long as they're roasted until tender and slightly browned.  God, it's so good.  And you can pair a whole bunch of flavors with them as well.  I've found that dried cranberries, maple syrup, and/or  balsamic vinegar are especially good.  Here are some recipe that I've tried, or would love to try, to help you get over your brussels sprout fear:

  • Roasted Grapes with Brussel Sprouts - I like this recipe because it's different.  Grapes and brussel sprouts aren't something I stumble upon often in one dish, and I had never had grapes roasted prior to trying this.  Well, yum.  The sweet grapes pair quite well with the brussels, and your taste buds are sure in for a surprise when you dig in.  I may or may not have eaten it with my fingers while standing over the stove.
  • Israeli Couscous with Brussel Sprouts and Cranberries - my very own recipe, and another tried and true favorite.  It's a bit more substantial than the other recipes, thanks to the couscous, so if you're looking for more of a light meal than a side dish, this may be the better choice.  And if you want to go totally crazy, add bacon.  Bacon makes everything better.


Trader Joes Cranberry Cranberry Chèvre Log - first of all, Trader Joes is like the best store ever.  I'm sure you'll be seeing a lot from there.  They also happen to have pretty yummy samples... or they did the day they were offering this cheese at least.  I tried some, liked it, and bought it.  Just like that.  It's not something I would have been likely to buy otherwise, as I'm not such of a cheese fan (I know, I know, it's weird), but thanks to that sample table, I'm now a goat cheese lover.  Just a warning to anyone wanting to try it, the appearance is a bit funny.  Don't let it scare you away though, this cheese is GOOD.  Spread it on crackers (a seedy type is best), toast, or the bread of your sandwich, and you're in for a tasty treat.  Just a note: I bought this around Thanksgiving, and I'm not positive, but I think it may be a seasonal product.  Sorry about that!  Just keep an eye out for it next year.  There are also similar products at other stores, if you want it sooner (I don't blame you).


Sweet Potato Desserts - no, I'm not talking about the butter, brown sugar, and marshmallow type.  The thought of those almost makes me want to barf.  When I say Sweet Potato Desserts, what I really mean are yummy desserts that take advantage of the awesome taste, texture, and color of sweet potato.  You've already seen one of my creations (link to it), but judging bu all the recipe ideas running through my head, there will be many more.  In the meantime, here are some recipes to help you jump on board the healthy sweet potato dessert bandwagon.
  • Sweet Potato Beet Cake - I've already mentioned this one, but it's too good not share again.  A fudgy cake, with an even fudgier frosting, this totally unique chocolate dessert takes advantage of the sweet potatoes creamy texture as well as the earthiness of beets.  It like nothing you've ever tasted before, in the best if ways.  You don't want to miss out on this dessert!
  • Sweet Potato Avocado Brownies - I haven't tried the exact recipe for these, but I have  modified it to be a bit less decadent (and nut-free).  That version turned out rather nicely, so I highly recommend checking out the original.  It's got a chocolate hazelnut frosting that looks and sounds simply incredible, so I have no doubt the brownies will be a decadent and delicious dessert.  And even If you don't plan on making them, I'd click the link just so you can drool over the pictures.  The one with the dirty spoon is my favorite.
  • Sweet Potato Chocolate Chip Jar Cakes - You better bet I want to try these.  A sweet potato cake is something I can't say I've ever had, but based on the pictures from this post, it's definitely something I'd like to try.  And so so so cute when baked into the little jars.  Oh yeah, and there's chocolate involved.  I'm thinking this recipe is definitely a winner.

Whole Foods 365 Bite Size Stoneground Crackers - These are currently my favorite crackers.  They're salty, crunchy, and have the perfect size.  I've tried other stoneground crackers in hopes of finding another favorite, but they just don't do it for me.  It's gotta be the bite size stoneground crackers that you buy from whole foods for a higher price than you should.  Call me crazy, but it's true.  I love them some much that I've even speculated about how I could make them myself (anyone know how to make crunchy crackers?).  Some of my favorite ways to enjoy the crackers are with goat cheese (of the cranberry variety perhaps), a thick slather of jam, or straight from the bag by the handful.  Yeah, I like that last one a lot.


Glazed Salmon - I eat salmon once a week, and almost every time it's with some sort of glaze on it.  One time I ate it with a spice rub instead and it just plain wasn't as good.  Now, I pretty much only make salmon with some sort of marinade or glaze.  The sticky, slurpy, texture it adds to a salmon dish is the best thing ever, especially when you scoop up all the extra glaze after the fish is done baking and slurp it off a spoon.  It sounds bad... But it's so good.  Here are some of my favorite recipes so that you can taste this awesomeness too.
  • Sweet Chili Glazed Salmon - I use this recipe to make salmon the most often.  I love it because its easy, tasty, and pretty fast too.  I use the sweet chili glaze from Trader Joes , but feel free to use your favorite brand. It all depends on what you like best.  You can also switch out the veggies in the recipe for some of your favorites.  I'm a fan of asparagus or green beans.
  • Honey Thyme Glazed Trout or Salmon - I've tried this recipe several times as well (sometimes with salmon, sometimes with trout).  It's pretty different from the first one, but still just as yummy.  I never follow the exact recipe, however, so I'm not sure what would happen if you did.  The changes I typically make are adding soy sauce, some olive oil, and baking instead if broiling until done.  With those changes, the result is pretty darn delicious, and a great meal too.

Peanut Butter & Co Cinnamon Raisin Swirl Peanut Butter - I had heard good things about this before trying it, and was pretty sure it would be something I'd love.  The only problem was that it was so darn expensive.  It seemed crazy to spend the going price for a little jar.  Then one day I found it on sale... And I pounced.  You guys, it's so yummy.  The peanut butter spread has a lot if cinnamon flavor, a couple raisins scattered about, and a really unique texture.  The texture was what surprised me the most.  It's a bit granule, like little sugar crystals are scattered through it.  Maybe that doesn't sound super appealing, but it really adds a uniqueness to the spread.  Almost like you're eating what would still be on the knife after spreading peanut butter on a slice of cinnamon raisin bread.  My ultimate favorite way to eat this awesome butter is by the spoonful (as with many nut butters), but if you prefer to be more proper, its also great on apple slices or just plain old toast.  I imagine it would be a pretty good oatmeal topper too.  Now that I've tried it, I'm working on creating my own version... I'll keep you posted on that.


Yogurt and Cereal Parfait - I found a way to make cereal filling!  One of my most common breakfasts these days consists of some sort of cereal, Greek yogurt, and whatever fruit I happen to have on hand.  I layer it all into a pretty little parfait and it makes for a fast and satisfying breakfast.  I've even started to scour the grocery store for new cereals to try in my creations.  I try to stick to low sugar brands, that will go well with lots if flavors.  Some types that I've tried and liked are Corn Chex, Cinnamon Puffins, and Kashi Crunch.  The fruits I use in the parfaits are usually frozen, or pretty easy to come by.  Apples coated in cinnamon, frozen mixed berries, and frozen mango are some common ones.  As for the yogurt, mostly its just plain 0%, but sometimes I mix it up with some fruit flavors or vanilla.  Here are some fun flavor combinations in case you want to make your own parfait:
  • Apple Pie -0% vanilla Greek yogurt layered with your favorite cereal, and  some warmed and cinnamon coated apples.  To make the apples, just microwave the pieces, after sprinkling with cinnamon, for a minute or so.
  • Blueberry Overload - 1 individual container of fruit at the bottom blueberry chobani, a cereal of choice (if its berry flavored, even better) and plenty of frozen blueberries.  This one may stain your lips purple, but it's worth it!