Showing posts with label Cereal. Show all posts

Wednesday, September 18, 2013

Chocolate Cereal Fudge Bars

Guess what?  These bars would have been some really cool no bake layered dessert with a bunch of different flavors, but I sort of ran out of energy halfway through so you get these.  Sorry...?


The good thing is, the bars I did come up with, while not elaborate or fancy, are still delicious and yummy and awesome.  And no one's ever complained about simple have they?  It just means getting your chocolate into your mouth more quickly and that's never a bad thing.  

No really, the quicker I get my chocolate, the happier I will be.


Here's the basics you need for these bars:
  • Tofu
  • Cocoa Powder
  • Chocolate Chips
  • Your favorite cereal (I used Cheerios)
  • A Pan
  • A Knife
Boom.  Look at how simple.  How can you resist these guys now?  I bet you're already heading to your kitchen.


Chocolate Cereal Fudge Bars

  • 2 1/2 cups of your favorite cereal (I used cheerios, you'll want to use something similar)\
  • 1/4 cup special dark cocoa powder
  • 1/2 cup chocolate chips, melted
  • 1 package tofu (I used shelf stable from Trader Joes)
  • 2 tbsp maple syrup
  • 2 tbsp milk
Measure cereal into a large bowl.  Set aside.  In the bowl of a food processor, combine remaining ingredients.  Blend until completely smooth with no tofu chunks remaining.  Pour chocolate mixture over cereal and mix until all cereal has been coated.  Line an 8x8 square pan with parchment paper.  Scoop entire mixture into pan and press into an even layer.  Freeze until hard.  Once frozen, cut into 16 squares.  Before serving, let thaw a couple minutes so bars are easier to bite.  Store in freezer.


Revisited Recipe of the Day:

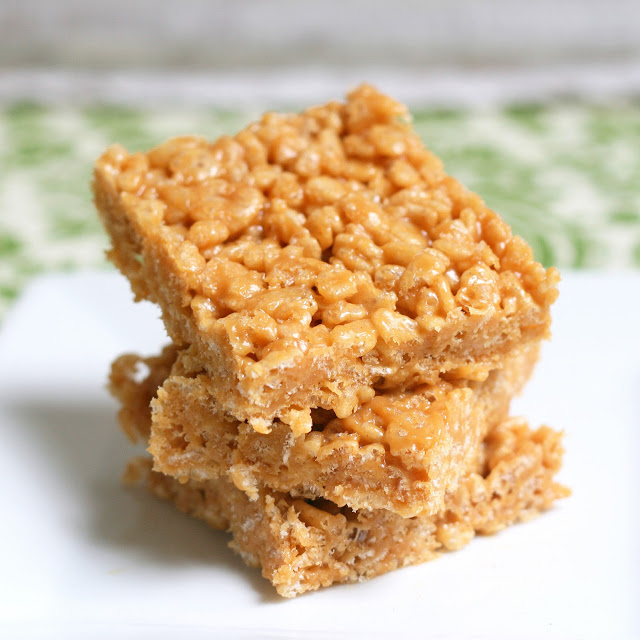
Peanut Butter Rice Crispy Treats


Pin It!

Wednesday, August 28, 2013

Peanut Butter Banana Balls

It's snack time!


Snacks are super important, especially with back-to-school time just around the corner. There are times when I come home from school absolutely starving and all I can think is FOOD!  During those times it's nice to have healthy snacks to reach for instead of the chips, candy bars, and cupcakes others are eating at the time.  Some of my after school snacks include: yogurt/cottage cheese with fruit, toast with peanut butter and banana, a slice of some homemade healthy dessert, and as long as these Peanut Butter Banana Balls are around, they make a perfect afternoon pick-me-up.


This is one of the simplest recipes on this blog.  All you need is peanut butter, a banana, applesauce, kashi go lean cereal (or another favorite), and rolled oats.  Yep, that's it.  Mash the banana with the peanut butter and applesauce.  Measure the cereal and oats.  Mix it all together.  Stick it in the fridge for a bit and then roll into cute little balls.  Pop 'em into your mouth and enjoy the deliciousness.


Yay for Peanut Butter Banana Balls!  You so want these as your afterschool/afterwork snack!


Peanut Butter Banana Balls
  • 1 1/2 cups kashi go-lean cereal (or try your favorite type)
  • 1 cup rolled oats
  • 1 large bananas (1/2 cup mashed)
  • 1/4 cup peanut butter
  • 1/3 cup applesauce (you may need slightly more or less depending on size of bananas)
Measure cereal and rolled oats into a large bowl.  In another bowl, mash banana.  Add peanut butter and applesauce and mix until incorporated.  Add banana mixture to dry ingredients and mix until combined.  Place mixture in a container and chill in fridge for at least an hour.  Once chilled, roll into balls.  Store in fridge until serving time.  Recipe makes about 25 small balls.


Revisited Recipe of the Day:

Chocolate Peanut Butter Sandwiches


Pin It!

Wednesday, March 27, 2013

Chocolate Banana Cups


I really wanted to call these s'mores cups.  I mean, everyone loves s'mores and these have all the components of them... they're just a bit different.

Graham crackers turn into a crust made from cereal, chocolate turns into, well, a chocolate cake filling, and the marshmallow is replaced with a banana and yogurt mixture that I swear has the exact same texture as the filling of an oreo cookie.


So, you see, these are sort of like s'mores, but then again, sort of not.  I figured it was better not to give people any false beliefs, so I stuck with the name Chocolate Banana Cups.  It's a bit boring, I'll admit, but no one's going to deny that this recipe is, indeed, for Chocolate Banana Cups.

Ok, so that was sorta boring.  Sorry.


Let's get to the good stuff, shall we?  Like the banana frosting stuff on these cups.  I mentioned it earlier, but I'll say it again.  Same texture as an Oreo cookie filling.  It's incredible, really.  And very delicious.

So is the crust on these things.  It's made with my new favorite cereal, Kashi Crunch!, and has no added fat. Pretty cool, huh?  I'd say these little guys as a whole are pretty awesome.

They may not be s'mores, but they've definitely got a lot going for them.


Chocolate Banana Cups
Crust:

Cake:
  • 1/2 cup rolled oats
  • 1/4 tsp baking soda
  • pinch salt
  • 3/4 tsp baking powder
  • 1/4 cup cocoa powder
  • 1 1/2 tbsp ground flax
  • 1 tbsp maples syrup
  • 1 tbsp turbinado sugar (or brown sugar)
  • 1 tsp vanilla extract
  • 3/4 cup pumpkin puree
  • 1/3 cup milk
Frosting:
  • 1 large, ripe banana, mashed
  • scant 1/2 cup plain or vanilla greek yogurt (just note that using vanilla will make frosting sweeter)
For Crust:
Preheat oven to 350F.  Place cereal in bowl of food processor and process until broken into small crumbs (this could get loud).  Add yogurt and process until fully incorporated.  Press a little bit of mixture into the bottom of the cups of greased muffin tins.  Set aside.

For Cake:
Place oats in food processor (you don't have to wash it from when you made crust), and process until ground into a flour (it's ok if some pieces are bigger than others).  Add remaining dry ingredients and process quickly to combine.  Add all remaining ingredients and process until a smooth batter forms.  Scoop a bit spoonful of batter on top of each prepared layer of crust.  Bake in preheated oven (it should be a t 350F) for  15 minutes.  Let cakes and crust cool at least 5 minutes before attempting to remove from pan.

For Frosting:
Rinse out the bowl of your food processor until no chocolate remains.  Place banana and yogurt (all ingredients for frosting) inside and process until a thick frosting like mixture forms.  It should look like an Oreo cookie's filling.  When cups have cooled, and have been removed from pan, spread frosting on top of each one.  Store in fridge.  Recipe yields 12 cups.


Now, time to healthify an Oreo cookie.  Don't you be thinking this is the last you'll see of that banana frosting!

Revisited Recipe of the Day:

Dark Chocolate Brownies with Banana Frosting


Pin It!