Showing posts with label bar. Show all posts

Friday, January 10, 2014

Dried Fruit Granola Bars

I don't know if this happens to anyone else, but in my family, we have a bit of a dried fruit problem.


It's not the eating that's the problem, it's the buying.  The quantity of dried fruit in our kitchen increases at an alarming rate, until it's practically spilling out of the cabinets.  I don't have an aversion to dried fruit (I'm looking at you, all you raisin haters), but things were getting a little out of hand.

Solution?  Make granola bars, of course.


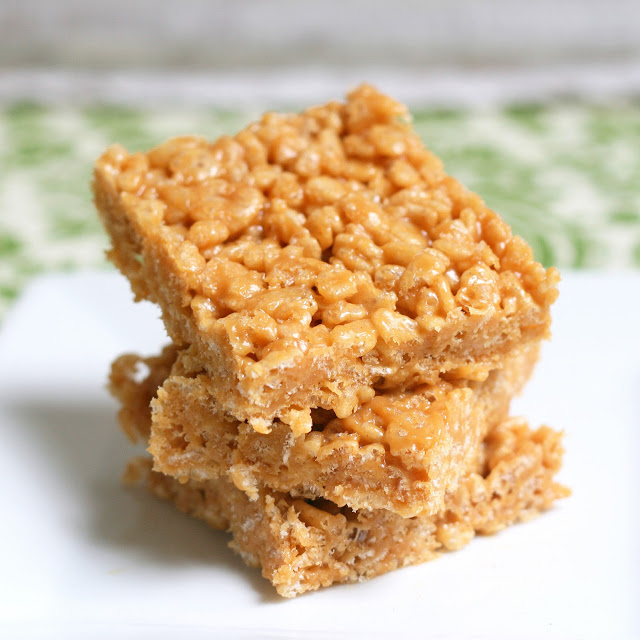
These bars are pretty versatile.  There's a simple base of oats, oat flour, applesauce, and peanut butter, and to that you add two cups of whatever the heck you want.  Dried fruit, chocolate, nuts, seeds, sprinkles, pretty much every mix-in you can think of will work.  I used 1 1/2 cups of dried figs, dried apricots, dried cranberries, prunes, and yellow raisins (yes, I had all of that on hand), and 1/2 cup of chocolate.  Because chocolate makes everything better, right?

Once that's done, all you've gotta do is spread your batter into a pan and pop it in the oven for about half an hour.


These are not wimpy granola bars.  They make a great afternoon pick-me-up and paired with some fruit and yogurt, one bar will keep you full for hours.

I'm a fan of store bought bars, don't get me wrong, but nothing compares to a homemade snack in both the nutritional and taste department.  You're gonna want to make these bars, guys, don't miss out a recipe this good.

Dried Fruit Granola Bars


  • 3 cups oat flour (to make: grind rolled oats into a fine flour in a blend, coffee grinder, or food processor)
  • 2 cups rolled oats
  • 1 tbsp baking powder
  • 1 1/4 cup applesauce
  • 1/2 cup honey or agave
  • 2 tbsp peanut butter (or another but butter of your choice)
  • 2 cups dried fruit, chocolate, and/or nuts of your choice (I used 1/2 cup chopped chocolate and 11/2 cups chopped dried fruit)
Preheat oven to 350F.  Grease a 9x9 square pan.  In a large bowl, mix together oat flour, rolled oats and baking powder.  Add applesauce, honey/agave, and nut butter and mix until completely combined.  Your dough will be wet and sticky at this point.  Mix in all of your desired add-ins until evenly incorporated.  Scoop dough into prepared pan and spread into a smooth and even layer.  Bake in oven for 28-32 minutes, until slightly golden and firm to the touch.  Once cooled, slice into 18 thin bars, and store in fridge until serving time.  Bars will keep in fridge for up to one week.


Happy Friday everyone!  What are your weekend plans?
Pin It!

Sunday, October 20, 2013

Chocolate Peanut Butter Granola Bars

I'm gonna let you in on a not-so-secret: I've been super busy lately.


It's not really a secret because if you so much as look around this blog you can probably tell.  How many posts have there been in October so far?  Not nearly enough.  How many recipes are missing from the recipes page? Like 4 months worth.  I'm falling behind on here, and I want to say one thing all you readers:

I'm so sorry!


I really wish I could do everything, but sometimes I'm forced to put one thing before the other.  I'm sad to say that this blog doesn't always take priority.

However, I'm pretty sure things will be slowing down within the next month, so fingers crossed everything goes back to normal around here!


How does this translate into today's recipe?

Well, these Chocolate Peanut Butter Granola Bars were a super helpful during days when I was rushing all over the place and didn't have time to grab a proper snack.  Instead of a grumbling belly, I got to snack on a delicious homemade granola bar!  Big, big help, I tell you.  Plus, they're no bake, so they even with the busiest schedule, you can fit in time to make them.


Chocolate Peanut Butter Granola Bars
  • 2 cups rolled oats
  • 1/2 cup uncooked quinoa
  • 2 tbsp chia seeds
  • 1/3 cup whole wheat pastry flour
  • 1/3 + 1/4 cup peanut butter
  • 1/4 cup honey
  • chocolate, melted (I didn't measure it, just know you'll need enough to dip all the bars in)
Mix together oats, quinoa, chia seeds, and flour in a large bowl.  Place peanut butter and honey in another bowl.  Microwave in 15 second intervals until drippy.  Mix together.  Add peanut butter honey mixture to dry ingredients and mix until completely incorporated.  Form into bars (I made small squares) and place in fridge to firm (about an hour).  Once firm, remove from fridge and prepare melted chocolate.  Line a plate/pan with parchment paper.  Dip one side of bar in chocolate and place chocolate side up on parchment paper.  Repeat with all bars.  Return to fridge to let chocolate form.  Store in fridge.  Makes about 15 bars, but it changes based on size.


Pin It!

Friday, October 11, 2013

Apple Crumble Bars

I've already gone apple picking twice this season, yet I've neglected to post an apple recipe.  Oops?


The truth is, I've only made one so far.  Double oops?

But, in the hopes of regaining at least some of my food blogger status, it was a really good recipe and I still have 20 billion apple to use.  Soooo, hopefully there'll be a bit more of an apple explosion in the weeks to come.


Back to today's recipe.  It's simple, yummy, and positively full of fall flavor.  We've got apples, cinnamon, some maple syrup, all baked to warm perfection.  With vanilla ice cream or whipped cream it would be absolutely perfect.

So there.  Let the apple season of Mix it Up begin!


Apple Crumble Bars
For crust:

  • 1 1/2 cups oat flour
  • 1/2 cup rolled oats
  • 1 tsp cinnamon
  • 1 tsp baking powder
  • 1/2 tsp baking soda
  • 1/2 cup applesauce
  • 1/4 cup maple syrup
  • 2 tbsp milk (or more if dough seems to think)
  • 1 tbsp coconut oil, melted
For Filling:
  • 2 1/2 cups chopped apples
  • 2 tsp cinnamon
  • 2 tbsp cornstarch/arrowroot flour/starch
  • 2tbsp maple syrup
Preheat oven to 350F.  Grease an 8x8 square pan.  Mix together dry ingredients for crust in a large bowl.  Add wet and mix until a sticky and thick dough forms.  Add more milk if needed.  Take about 2/3 of the dough and press into the bottom of the pan until the whole area is covered.  Set aside remaining dough.  In another bowl, mix together all filling ingredients.  Pour filling onto dough in pan.  Scatter remaining dough in top.  Bake in preheated oven for 25-20 minutes, until crust has turned golden brown.  Let cool before cutting into 16 squares.  I think these are best served warm.


Pin It!

Thursday, September 26, 2013

Pumpkin Squares (Version 2)

Alright folks, it's officially fall.


The autumn equinox has passed and from now on days get shorter and colder and all around more depressing.  

But before all that we get the lovely season that is fall.  Crisp air, colorful leaves, and pumpkin and apple filled foods galore.  It's time I started spreading some fall cheer, no?


There's one recipe that's get's 10x more popular as September rolls around.  It's the first recipe ever posted on this blog, and it's one of the simplest ones as well.  I love it, you love it, everyone loves it.  After all, who can resist pumpkin squares

Certainly not me, which is why I decided to re-do the recipe this season to make it even better. Looking back on that recipe there are some things I don't like about it.  For example, the white flour and white sugar that I used.  Back then, I didn't have all my special sweeteners and spelt flour packages.  Now I've got 'em and i wanted to healthify those pumpkin squares even more.


Behold, the delicious result.  Pumpkin squares with no white sugar, no white flour, no oil, and no butter.  Oh yeah, and they're pretty darn delicious as well.

Pumpkin Squares (Version 2)
  • 1 cup spelt flour
  • 1 tsp cinnamon
  • 1 tsp baking powder
  • 1/2 tsp ground ginger
  • 1/2 tsp baking soda
  • 1/4 tsp salt
  •  1 cup pumpkin puree
  • 2 egg whites
  • 1/4 cup maple syrup
  • 1 tsp vanilla 
 Preheat oven to 350F.  Grease an 8x8 square pan.  In a large bowl, whisk together dry ingredients.  In another bowl, mix together pumpkin, egg whites, maple syrup, and vanilla.  Add wet ingredients to dry and mix until a thick batter forms.  Scoop into prepared pan and spread into an even layer.  Bake for 25-20 minutes, until firm.  Bars will be a bit gooey at first, but if you let them sit overnight they will dry out a bit and become less gooey.  It's your choice how to eat them.  When serving time comes, cut into 16 squares.


Pin It!

Wednesday, September 18, 2013

Chocolate Cereal Fudge Bars

Guess what?  These bars would have been some really cool no bake layered dessert with a bunch of different flavors, but I sort of ran out of energy halfway through so you get these.  Sorry...?


The good thing is, the bars I did come up with, while not elaborate or fancy, are still delicious and yummy and awesome.  And no one's ever complained about simple have they?  It just means getting your chocolate into your mouth more quickly and that's never a bad thing.  

No really, the quicker I get my chocolate, the happier I will be.


Here's the basics you need for these bars:
  • Tofu
  • Cocoa Powder
  • Chocolate Chips
  • Your favorite cereal (I used Cheerios)
  • A Pan
  • A Knife
Boom.  Look at how simple.  How can you resist these guys now?  I bet you're already heading to your kitchen.


Chocolate Cereal Fudge Bars

  • 2 1/2 cups of your favorite cereal (I used cheerios, you'll want to use something similar)\
  • 1/4 cup special dark cocoa powder
  • 1/2 cup chocolate chips, melted
  • 1 package tofu (I used shelf stable from Trader Joes)
  • 2 tbsp maple syrup
  • 2 tbsp milk
Measure cereal into a large bowl.  Set aside.  In the bowl of a food processor, combine remaining ingredients.  Blend until completely smooth with no tofu chunks remaining.  Pour chocolate mixture over cereal and mix until all cereal has been coated.  Line an 8x8 square pan with parchment paper.  Scoop entire mixture into pan and press into an even layer.  Freeze until hard.  Once frozen, cut into 16 squares.  Before serving, let thaw a couple minutes so bars are easier to bite.  Store in freezer.


Revisited Recipe of the Day:

Peanut Butter Rice Crispy Treats


Pin It!

Sunday, July 21, 2013

Quinoa Granola Bars

Is it really already July 21st?  We're one month into summer folks!  How does it feel?

Personally, it's going a bit fast for my liking, but at least it feels like the summer.  I don't know about where you live, but the temperature has be absolutely soaring here. Thank god for cool drinks (link that), pools, and air conditioning.


The 21st of the month means one thing around here: the Recipe ReDux.  This months theme?  Travel snacks.  Foods that you're sure to have on hand whenever you go away.  Ideally, they travel well, can pass through airport security, and won't go bad after hours in a car.  All that is easier said than done, but I came up with a winner recipe this month, I can promise you that.


Whenever I go away the one thing I'm sure to bring is a protein bar.  I wish I could say I'm cool enough to make my own, but that really isn't the case.  I just pick up some packaged bars from the store and throw them in my bag.  I like that they're easy to pack, have enough substance to satisfy me, and also taste pretty yummy.  Basically, I wanted to incorporate all that into a homemade travel snack.

With the result being these Quinoa Granola Bars, my mission was accomplished.


Lets go over my three goals.

1.  A snack that's easy to pack.

I knew instantly that I wanted to make a bar.  You can throw them into a plastic bag, wrap them up in aluminum foil, or do whatever else to package them before simply throwing them wherever.  Bars typically don't need a specific temperature and they done require a ton if space either.  As far as these homemade granola bars go, they're a bit fragile, but you can treat them however you would treat another granola bar in terms of packing for a trip.

2.  A snack that keeps you satisfied

More protein bars use protein powder to pack in some punch.  I don't have protein powder, and have no desire to buy s big jar just to make some granola bars.  I thought hard for a replacement and finally came up with using quinoa.  It adds a bit of protein and also some fiber to keep you full.  I ended up using cooked quinoa in the final granol pa bar recipe.  It sounds a bit strange, but it works like a charm.

3. A snack that tastes awesome

Of course these bars taste great.  They're flavored simply with cinnamon and a nut butter of you choice. I used peanut butter and it worked great.  The simplicity of the bar leaves plenty of room for you to customize it for your liking.  Add chocolate chips, nuts, or dried fruit.  It will all be awesome, I promise.


Quinoa Granola Bars

  • 1 cup quick oats (make your own quick oats by quickly blending rolled oats until they break down a bit)
  • 1 cup cooked quinoa (see package for cooking instructions)
  • 1/4 cup oat flour (grind oats in a coffee grinder until they reach a flour-like consistency)
  • 1 tsp cinnamon
  • 1/4 cup honey
  • 1/4 cup applesauce
  • 1/4 cup nut butter of choice (I used peanut butter)
  • 1/2 tsp vanilla
  • optional: add-ins like chocolate chips, nuts, or dried fruit
Preheat oven to 350F.  Line an 8x8 pan with parchment paper.  In a large bowl, mix together oats, quinoa, oat flour, and cinnamon.  Add honey, applesauce, nut butter, and vanilla.  Mix until a sticky mixture forms.  If you want to use any add-ins, throw in a handful now, and mix them in.  Press mixture into prepared pan.  Bake in preheated oven for 10 minutes.  Remove from oven and let cool.  Once cooled, cut into 8 bars.  Store in an airtight container.  For traveling, put bars in a blastic bag or wrap in aluminum foil.


Revisited Recipe of the Day:

Chocolate Quinoa Fudge Bars


Pin It!

Monday, January 7, 2013

Funfetti Baked Oatmeal Bars


How do you brighten up a Monday morning?

With sprinkles of course!


And a wholesome breakfast.

Lucky for you, these Funfetti Baked Oatmeal Bars can provide both those things.


Made from oats, greek yogurt, and sprinkles these bars have everything you need to start the day right...

Fiber, protein, and a whole lot of rainbow color!


Pair one with an apple or some more yogurt and you've got yourself an easy, healthy, and fun breakfast!

Aren't sprinkles the best?


Funfetti Baked Oatmeal Bars

  • 2 cups rolled oats
  • 1/2 tsp cinnamon
  • 1/4 tsp salt
  • 1/2 cup applesauce
  • 1/2 cup vanilla greek yogurt
  • 1 cup water
  • 2/3 cup milk
  • 1 1/2 tsp vanilla extract
  • 2 tsp maple syrup
  • 1/2 banana, sliced into small chunks
  • Sprinkles, how ever much you want (I used 1/4 cup)
Preheat oven to 350F.  In a large bowl, combine oats, cinnamon, and salt.  Add in appesauce, yogurt, water, milk, vanilla, and maple syrup and mix well to combine.  Mixture will be runny.  Fold in banana and sprinkles.  Pour mixture into greased 8x8 pan.  Bake for 25-27 minutes, or until firm.  Remove from oven and let cool before slicing into 9 large squares.  Bars freeze well.

View Nutrition Facts Here


So here's the deal with these guys.  They take a bit of time to make, but once you bake 'em all you've gotta do it cut and freeze, and you have breakfast for the whole week!

How cool is that?  Believe me, it sure solves the breakfast in a rush situation.  Bar, fruit, done.

It's as simple (and delicious) as that.

Revisited Recipe of the Day:

Ginger Oatmeal Cookie Sandwiches


Pin It!

Thursday, October 25, 2012

Pumpkin Raisin Baked Oatmeal Bars

It really wouldn't be hard to have pumpkin in every meal of the day.


All you'd have to do is have pumpkin soup for lunch, a side of roasted pumpkin with dinner, a couple pumpkin raisin cookies as snacks, and a pumpkin square or two for dessert.  Oh right, and one of these bars for breakfast.


There are so many great things about these Pumpkin Raisin Baked Oatmeal Bars, I wouldn't be surprised if you find yourself grabbing two.

For one, they're completely delicious.  Pumpkin-y goodness with juicy raisins and just the right amount of chew from the rolled oats.  Yum.  Also, these bars are unbelievably filling.  If you pair one with some plain greek yogurt, it will keep you full for hours.  Seriously, there will be no grumbling bellies with these in your morning routine.

I also recommend these as a breakfast for anyone who finds themself rushing out of the door in the morning without breakfast.  Don't ever skip breakfast just because you're in a rush.  It results in a definite bad day.  Instead, grab one of these bars and eat it on your way to work.  See?  Problem solved.


I'm not usually one to eat the same breakfast multiple days in a row, but when I made these, on a Sunday, I had one every morning until they were all gone.

I remember that was a really busy week and I was often pressed for time in the morning.  These bars really came in handy then, because I froze them , and then just reheated one in the microwave each morning and gobbled it up with some yogurt.  It took like 2 minutes.  Please tell me you have 2 minutes in the morning to incorporate in some delicious-ness.


I'll go ahead and give you the recipe now before you get bored and stop reading.  This is not a breakfast to miss out on.

Pumpkin Raisin Baked Oatmeal Bars
(makes 9 large squares)
  • 2 cups rolled oats
  • 2 tsp cinnamon
  • 1/2 tsp ginger
  • 1/4 tsp allspice
  • pinch cloves
  • large pinch salt
  • 1 cup pumpkin puree
  • 1 2/3 cup milk of choice or water
  • 2 tsp maple syrup, or to taste
  • 1 tsp vanilla extract
  • 1/3 raisins
Preheat oven to 380F.  Combine all dry ingredients (not raisins) in a large bowl and mix well.  Add in pumpkin, milk/water,  maple syrup, and vanilla.  Stir to combine.  Mix in raisins.  Mixture with be wet and may not hold together.  Pour into greased 8x8 pan and bake for 20-25 minutes, or until oatmeal is firm.  Let cool before cutting.


So here's what all you busy, breakfast missing people should do:

Throw together these bars Sunday afternoon.  Cut them into squares.  Then, either freeze them if you like warm breakfasts, or just leave them in the fridge if you don't care.  Each morning, before sprinting out the door because you're late for this or that, reheat/grab a bar and you're good to go.  It's super easy and way healthier than going without anything.

Enjoy!


Revisited Recipe of the Day:

Baked Oatmeal Blueberry Muffin


Pin It!

Thursday, October 18, 2012

Pumpkin Molasses Fudge Bars

It's time for a math problem.

Ginger Molasses Blondies + Pumpkin Pie Fudge = What?


There are actually two correct answers.

1. Insanely Delicious, and

2. This recipe for Pumpkin Molasses Fudge Bars

If you guessed either of the above give yourself a nice pat on the back.  If you didn't... then, well, what did you think of?


In all honesty now, these bars really do taste like a cross between the two desserts listed above.  Not intentionally, though.  These actually have a sort of funny story that goes with them.

They were meant to be similar in texture to cake.  I was even loosely following a cake recipe.  But, then, I had this sudden thought that maybe adding some pureed tofu to the wet ingredients would help to add creaminess to the final product.  Unfortunately, when this thought hit me, I didn't stop to consider what would happen when it baked, instead I just went for it.

Guess what?  It did add creaminess.  I could tell that much just from tasting the batter (which was delicious).  However, tofu also added a fudgey-ness to the final product that was not completely expected.  This may not seem like a bad thing to you, but when I first opened the oven door and saw that the so-called "cake" I had attempted to make had not risen at all, well, I was pretty disappointed


I considered just throwing away these bars right then and there.  I don't like wasting though, and thought that I might as well just give them a taste.  Thank god I did!  At just one tiny bite I was sold.  Who cares if they didn't turn out as planned?  These Pumpkin Molasses Fudge Bars were creamy, flavor packed, and just the right amount of fudgy.

Yay for tofu!  It's becoming one of my new favorite ingredients.


Pumpkin Molasses Fudge Bars*
(makes 8 bars, sized as in the pictures)
  • 1/2 cup flour of choice (I used all purpose)
  • 1/4 tsp baking powder
  • pinch salt
  • 1/2 tsp cinnamon
  • 1/2 tsp ginger
  • 3 tbsp mori-nu silken firm tofu (refrigerated tofu may work too, but I haven't tried it)
  • 1/4 cup pumpkin
  • 1 tbsp ground flax
  • 1 tbsp oil (I used coconut)
  • 1 tsp vanilla extract
  • 3 tbsp molasses
  • 1 tbsp milk
Preheat oven to 350F.  Combine dry ingredients in a small bowl.  Mix well.  Blend together remaining ingredients in a blender.  Once smooth, pour wet into dry and stir until well combined.  Scoop batter into loaf pan and smooth on top.  Bake for 10 minutes.  Then remove pan from oven and let cool for at least an hour before serving.  (Note: These bars taste even better if allowed to sit overnight)


After my first bite of these, I quickly set up a photoshoot, and took lot's of pretty pictures of my delicious creation.  Then I set the bars on a plate like I always do after I've photographed a recipe, and left them on the counter.

When I glanced back at them about an hour later there was one left.  Apparently, my family had eaten all the rest just in that short amount of time.  I was thrilled!  Not only was this recipe loved by me, but my family members also loved their unique fudgey-ness.

That was like the last trial.  It was then that I realized that these bars definitely belong on the blog.  So if you're skeptical, I understand that, but, really, just think about the information I just gave you.


Revisited Recipe of the Day:

Fudgy Pumpkin Crownies


*By posting this recipe I am entering a recipe contest sponsored by The Soyfoods Council and am
eligible to win prizes associated with the contest. I was not compensated for my time.


Pin It!