Monday, September 30, 2013

Chocolate Pudding Cake

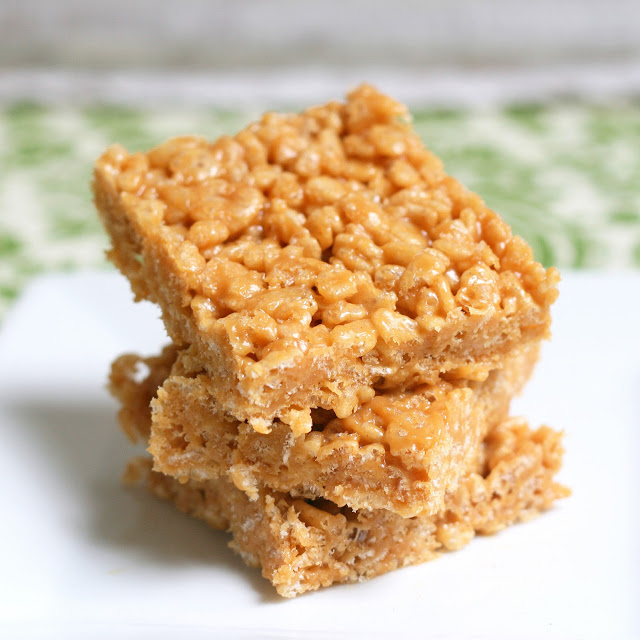
Chocolate + Pudding + Cake = ????


Something that looks like that up there.  And tastes really good.  And is super chocolate-y.  And is good served warm or cold.  And is all around amazing.

There, I taught you a new math fact.


If only school could be like that.  Instead of learning about equations and the history of the United States, we could decide how many cookies equals one piece of cake, and discover how the first cake was created.  But alas, apparently it's more important to learn about other things.

At least I've got this pudding cake to come home to :)


Chocolate Pudding Cake

  • 2 cups oat flour
  • 1/2 cup cocoa powder
  • 1 3/4 tsp baking powder
  • 1/4 tsp salt
  • 2 tbsp cornstarch or arrowroot starch/flour
  • 1 1/2 cups milk
  • 1/3 cu honey
  • 1/4 cup yogurt
  • 2 cups boiling water
  • 2 tbsp cane sugar
Preheat oven to 350F and grease an 8x8 square pan.  Mix together flour, cocoa, baking powder, cornstarch and salt in a large bowl.  Add milk, honey, and yogurt and mix until incorporated.  Mixture will be thin.  Pour into prepared pan.  Pour boiling water on top of batter, and sprinkle sugar on top of that.  DO NOT MIX.  Place in oven immediately and bake 40-45 minutes.  It will still look under baked when you take it out, but that's ok.  Let chill overnight before servings.  Scoop into bowl and serve warm or cold.  Makes 16 smaller servings or 9 big ones.  Store in fridge.


Pin It!

Thursday, September 26, 2013

Pumpkin Squares (Version 2)

Alright folks, it's officially fall.


The autumn equinox has passed and from now on days get shorter and colder and all around more depressing.  

But before all that we get the lovely season that is fall.  Crisp air, colorful leaves, and pumpkin and apple filled foods galore.  It's time I started spreading some fall cheer, no?


There's one recipe that's get's 10x more popular as September rolls around.  It's the first recipe ever posted on this blog, and it's one of the simplest ones as well.  I love it, you love it, everyone loves it.  After all, who can resist pumpkin squares

Certainly not me, which is why I decided to re-do the recipe this season to make it even better. Looking back on that recipe there are some things I don't like about it.  For example, the white flour and white sugar that I used.  Back then, I didn't have all my special sweeteners and spelt flour packages.  Now I've got 'em and i wanted to healthify those pumpkin squares even more.


Behold, the delicious result.  Pumpkin squares with no white sugar, no white flour, no oil, and no butter.  Oh yeah, and they're pretty darn delicious as well.

Pumpkin Squares (Version 2)
  • 1 cup spelt flour
  • 1 tsp cinnamon
  • 1 tsp baking powder
  • 1/2 tsp ground ginger
  • 1/2 tsp baking soda
  • 1/4 tsp salt
  •  1 cup pumpkin puree
  • 2 egg whites
  • 1/4 cup maple syrup
  • 1 tsp vanilla 
 Preheat oven to 350F.  Grease an 8x8 square pan.  In a large bowl, whisk together dry ingredients.  In another bowl, mix together pumpkin, egg whites, maple syrup, and vanilla.  Add wet ingredients to dry and mix until a thick batter forms.  Scoop into prepared pan and spread into an even layer.  Bake for 25-20 minutes, until firm.  Bars will be a bit gooey at first, but if you let them sit overnight they will dry out a bit and become less gooey.  It's your choice how to eat them.  When serving time comes, cut into 16 squares.


Pin It!

Saturday, September 21, 2013

No Bake Cookie Dip {Recipe ReDux}

I'm sure by now most of you have heard of the deliciousness that is Cookie Butter.


I haven't tried the crunchy stuff yet, to be honest I'm a bit scared I'll become addicted, but I did find a half eaten jar of the regular kind hidden in my cabinet last week.  A tried a little spoonful, and bam, I was hooked again.

Spreadable cookies in a jar is something I doubt many can resist.


In an attempt to make the remaining butter disappear before I could stuff it all into my mouth in one go, I decided to use it in a bit of my baking.  Or, in this case, no baking.  This months recipe ReDux theme is to go raw and create a quick, no bake, healthy dessert.

I took the cookie route and added a couple tablespoons of Cookie Butter to a typical Cookie Dough Dip recipe.  The result was a thick dip with hints of cinnamon and gingerbread and quite the addictive quality.  If you decide to make it, I must warn you, it may last even less time than the cookie butter.


Cookie Dip (With Cookie Butter!)

  • 1 can white beans, drained and rinsed well
  • 1 cup rolled oats
  • 1/4 cup milk
  • 1/2 banana
  • 3 tbsp cookie butter
  • 2 tbsp molasses
  • 2 tbsp sugar
  • 1 tsp cinnamon
  • 2 tsp vanilla
Place all ingredients in the bowl of a food processor.  Blend on and off until ingredients are well mixed and a thick mixture has formed.  Make sure there are no chickpeas clumps.  Scoop into a bowl and store in fridge until serving time.  Use as a dip for cookies or fruit, or spread onto toast.


Pin It!

Wednesday, September 18, 2013

Chocolate Cereal Fudge Bars

Guess what?  These bars would have been some really cool no bake layered dessert with a bunch of different flavors, but I sort of ran out of energy halfway through so you get these.  Sorry...?


The good thing is, the bars I did come up with, while not elaborate or fancy, are still delicious and yummy and awesome.  And no one's ever complained about simple have they?  It just means getting your chocolate into your mouth more quickly and that's never a bad thing.  

No really, the quicker I get my chocolate, the happier I will be.


Here's the basics you need for these bars:
  • Tofu
  • Cocoa Powder
  • Chocolate Chips
  • Your favorite cereal (I used Cheerios)
  • A Pan
  • A Knife
Boom.  Look at how simple.  How can you resist these guys now?  I bet you're already heading to your kitchen.


Chocolate Cereal Fudge Bars

  • 2 1/2 cups of your favorite cereal (I used cheerios, you'll want to use something similar)\
  • 1/4 cup special dark cocoa powder
  • 1/2 cup chocolate chips, melted
  • 1 package tofu (I used shelf stable from Trader Joes)
  • 2 tbsp maple syrup
  • 2 tbsp milk
Measure cereal into a large bowl.  Set aside.  In the bowl of a food processor, combine remaining ingredients.  Blend until completely smooth with no tofu chunks remaining.  Pour chocolate mixture over cereal and mix until all cereal has been coated.  Line an 8x8 square pan with parchment paper.  Scoop entire mixture into pan and press into an even layer.  Freeze until hard.  Once frozen, cut into 16 squares.  Before serving, let thaw a couple minutes so bars are easier to bite.  Store in freezer.


Revisited Recipe of the Day:

Peanut Butter Rice Crispy Treats


Pin It!

Sunday, September 15, 2013

Chocolate Prune Hazelnut Spread


When I was younger, I loved a picture book called Chocolatina.  It was about a girl named Chocolatina who loved chocolate more than anything, and her health teacher who insisted that you should only eat healthy foods and loved prunes the way Chocolatina loved chocolate.

The health teachers favorite saying was "You are what you eat," and one day Chocolatina wished that it would be true.  The next day she woke up as a chocolate girl.  As it turns out, being chocolate is no fun especially when you find out your health teacher is actually a chocoholic in disguise and she tries to eat you.


Now that i'm older and wiser, I've come up with a way that Chocolatina and her health teacher could have avoided all those problems, and actually formed quite a strong friendship.  The thing is, prunes have gotten a bad rep for no reason.  They're actually quite tasty, and even more tasty when you pair them with chocolate.  Chocolate + prunes = absolutely delicious.

In today's recipe, I paired prunes with chocolate and with hazelnuts.  There was seriously no way it could go wrong, and I was right, it didn't.  This spread is sososo good.  So good it could have even have brought Chocolatina and her health teacher together.


Chocolate Prune Hazelnut Spread
  • 1 1/4 cup hazelnuts
  • 1/2 cup prunes
  • 1/4 cup extra dark cocoa powder
  • 1/4 milk
  • 1/4 cup honey
Preheat oven to 350F.  Place nuts on baking sheet, and roast in oven for 6-8 minutes, until nuts are fragrant and the skins are splitting.  Remove skin from as many nuts as possible and place in a food processor or vitamix.  Blend on and off until nuts have formed a butter.  Stop and scrape down the sides of the machine as necessary.  Add remaining ingredients and blend until completely blended and smooth.  Make sure there are no prune clumps.  Transfer to a jar and store in fridge.  Spread on toast or fruit, swirl into oatmeal, or simply eat off a spoon.


Revisited Recipe of the Day:

Honey Banana Almond Butter


Pin It!

Thursday, September 12, 2013

Gooey Chocolate Chip Bars


One of my favorite, favorite desserts is a gooey chocolate chip cookie.  I love how the really good ones bend, but don't snap, and how the melted chocolate chips ooze out when you take a bite.  How the best cookies are thick and soft, and just melt in your mouth.

Today what I've done is taken the best, most delicious, cookie I can think of, and turned it into a thick, gooey Chocolate Chip Bar.  Aaaand... I made it pretty darn good for you too!


So, you're probably thinking to yourself, what's the catch?  How can something that looks and sounds so decadent be healthy?  Well, I'll have you know that I've got a few tricks up my sleeve.  I'll give you a run down of all the healthy swaps in the recipe.

  1. Canned white beans -> they replace the butter/fat and provide a lot of the bulk of the bars
  2. Banana + maple syrup -> all you need in the form of a sweetener.  No sugar here!
  3. Tofu -> adds bulk and lends to the gooey texture
  4. Oats -> they replace all the flour and make the recipe gluten free
Hopefully you're not too afraid at this point, because these bars are not something you want to miss out on.


Gooey Chocolate Chip Bars

  • 1 (15oz) can white beans
  • 1 ripe banana
  • 1 1/2 cups rolled oats
  • 1 cup shelf stable tofu (200g)
  • 1/4 cup applesauce
  • 2 tbsp maple syrup
  • 2 tsp vanilla
  • 1 1/2 tsp baking powder
  • 1/2 tsp baking soda
  • 3/4 cup chocolate chips
Preheat oven to 350F.  Line an 8x8 pan with parchment paper.  Drain and rinse beans.  In the bowl of a food process combine all ingredients except chocolate chips.  Blend until a smooth mixture forms, with no bean or tofu chunks.  Once smooth, add chocolate chips and process quickly to incorporate.  Pour into prepared pan and spread into an even layer.  Bake in preheated oven for 30 minutes, until mixture has set.  Let cool completely before slicing into 16 squares and serving.  Store in fridge.


Revisited Recipe of the Day:

Chocolate Chip Banana Cookie Pie


Pin It!

Monday, September 9, 2013

Peach Quick Bread

Does anyone remember when I put tea in all my recipes?  If ya do, I'm totally doing it again.


I tend to forget about tea during the summer months.  Except for the Passion fruit Iced Tea from Starbucks (love that stuff), I never really crave a cup of tea when it's so hot out.  But now that the weathers cooling down, I'm visiting my special tea drawer much more often.  The peach flavor caught my eye last weekend.  And then the peaches sitting on the counter captured my attention.  After I spotted the loaf pan in the pantry, I knew what had to be done.

Peaches + Peach Tea + Loaf Pan = some peach bread that's packed with flavor!


Last year I made Apple Cinnamon Bread.  This recipe is based on that one, with some small changes.  It's like the summer version (because summer is still here)!

A slice of this Peach Bread is soft, slightly sweet, and filled (and I mean filled) with peach flavor, thanks to both peach tea and chopped peaches.  This is a great way to keep the summer mood going, although it would be great on a cold day too.  Really this bread is just good for anytime.  By the way, that includes right now.  Get baking!


Peach Quick Bread

  • 1 cup spelt flour
  • 1 cup oat flour
  • 1/2 tsp cinnamon
  • 1 tsp baking powder
  • 1/2 tsp baking soda
  • the leaves of one bag peach flavored tea (caffeine free)
  • 1/3 cup egg whites (2)
  • 1/2 cup applesauce
  • 1/4 cup honey
  • 2/3 cup milk
  • 3/4 cup chopped peaches
Preheat oven to 350F.  Mix together dry ingredients in a large bowl.  Add egg whites, applesauce, honey, and milk.  Mix together until a smooth batter forms.  Fold in chopped peaches.  Pour into a greased loaf pan.  Bake in preheated oven for 20-25 minutes, until a toothpick comes out clean.  Slice when cooled, and then serve.


Pin It!

Thursday, September 5, 2013

Creamy Lemon Bars


If you were to ask me about my favorite recipes on this blog, almost every one would most likely contain chocolate.  What can I say?  I'm a chocoholic.  But after trying these Creamy Lemon Bars, I can say that they would most definitely make the list.

Why yes, they are good enough to hold their own next to a bunch of kick-butt chocolate recipes.


There's nothing super special about these bars.  In fact, they're actually quite simple.  Just a quick crust and a lemon filling.  So what puts them on my favorite list, you ask?  That's simple.  They taste really really good.


No one really had high hopes for these bars.  Like, sure, they would taste good, and you would have no problem with eating some, but no one was like "Oh my god i can't wait until those Lemon bars are ready because they're gonna be amazing and I'm gonna eat the whole pan in one sitting" (for the record, that may be the way I react when there's chocolate mousse chilling in the fridge).

Everything changed when I took the first bite.  Dang, these guys were good!  I shared them with everyone in my family and before I knew it, every last bar was gone.  There's only one solution there: make them again.  So I did.  And you know what you should do?  Make them.  And then make them again because soon you'll have enhaled the whole first pan.


Creamy Lemon Bars
Crust:
  • 1 1/3 cup + 2 tbsp oat flour (sorry for the weird measurement)
  • 2 1/2 tbsp honey
  • 2 tbsp coconut oil
  • 1/4 tsp salt
Filling:
  • 1 package shelf stable tofu (1 1/2 cups)
  • 1/3 cup lemon juice
  • 1/4 cup honey
  • 1 1/2 tbsp arrowroot starch/flour
  • zest of 1 lemon
Preheat oven to 350F.  Grease an 8x8 pan with cooking spray.  In the bowl of a food processor, combine all crust ingredients.  Mix until combined and a wet mixture has formed.  If it seems too dry, you can add a bit of milk until the proper consistency is reached.  Press into an even layer in the bottom of prepared pan.  Bake crust for 10 minutes.  Meanwhile, combinr all filling ingredients in food processor.  Mix until completely incorporated with no tofu clumps remaining.  Pour into baked crust.  Bake in oven for another 20 minutes, until filling has firmed around the edges.  Remove from oven and let chill in oven for at least 2 hours, until entire filling is firm.  Slice into 16 squares and serve.  Store in fridge.

Revisited Recipe of the Day:

Crustless Lemon Honey Cheesecake


Pin It!

Monday, September 2, 2013

Tropical Green Smoothie

It may be after Labor Day, but summer is not over.


I know Labor Day is considered the unofficial ending of summer, but can we just forget about that?  'Cause summer is very much still here and that's why you should make a cool, refreshing Tropical Green Smoothie and then sip it while out in the sunshine.

Don't try to tell me that it's out of season and that what I should be posting is some pumpkin thing because pumpkin is for fall and it's summer right now.  Smoothies are for summer, not pumpkin.


As you can, summer is very much still here in my mind.  I'm not accepting that it's fall until it's actually fall, and that will be on the 22nd of September.  Until then, I'm going to be throwing plenty of summer recipes at you, and they're awesome recipes so you're gonna be plenty happy.

Just forget about that pumpkin for a couple days, k?  I love pumpkin too, god knows I do, but I'm doing my best to keep it to a minimum until the actual season begins.  Buuuut maybe I'll throw in some pumpkin earlier too.  We'll see.


Back to the smoothie.  I've had a love-hate thing going on with green smoothies for a while now, I've had some really bad ones, and I've had some really great ones.  So, ya know, I was on the fence.  But that I just had to make one for myself and it was so pretty and delicious that I've decided green smoothie are my new best friend.  Plus, I just got a vitamix (!!!!!) so there's gonna be some intense smoothie making going on now.

As for this recipe, it's sweet and just slightly sour from the lemon juice.  It's got a gorgeous green color and it's super easy to make.  Here's a tip:  If you don't have a high power blender, blend the water and spinach first and then add everythign else.

Get blending!


Tropical Green Smoothie

  • 1 cup water
  • 1/2 cup frozen pinapple
  • 1/4 cup frozen mango
  • handful of fresh baby spinach
  • juice of up to 1/2 lemon (use more or less based on how sour you want it)
Combine all ingredients in a blender and blend until smooth.  If you don't have a super powerful blender, add just the water and spinach first.  Blend until the spinach is completely broken down and then add remaining ingredients.  Pour into a glass and serve right away.  Makes one serving, or two smoothie "shots".


Revisited Recipe of the Day:

Strawberry Blueberry Protein Smoothie
Pin It!